Due to the small size of the apartment with a specific layout, owners often have difficulty organizing the space. This is especially true for the placement of furniture, cabinets for storing things. The created dressing room in a small pantry with your own hands allows you to effectively solve this problem, to equip a rather functional room. There are many ways, ideas, the main thing is to decide on the option, and follow the manufacturing instructions.
What you need to make a dressing room from a small pantry
To successfully equip the dressing room from the pantry, there is no need for demolition of the walls, the pantry is quite suitable for these purposes. There will be enough space to place things in it, the main thing is to completely free it from unnecessary items, trash, and make cosmetic repairs.
It is important to completely get rid of crumbling plaster, in the future it will stain things. For the correct installation of stands, drawers, it is necessary to achieve a flat surface. One of the simple and budgetary ways to decorate a dressing room in Khrushchev with your own hands is to paint the walls with water-based paint and lay a wooden floor on the floor.
To avoid skewing the structure after each installation step, check the position of the elements with a laser level
Alternatively, you can lay the floor with a laminate. But to eliminate excess moisture, you will need special bags with silica gel.
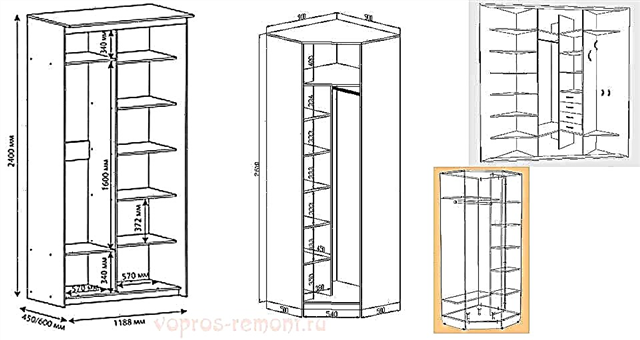
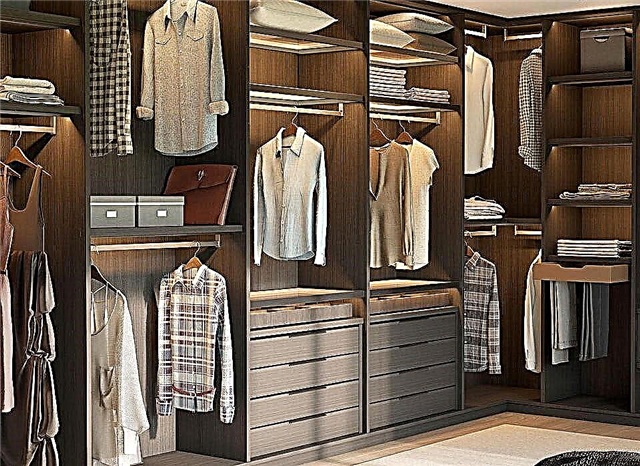
Before proceeding with the conversion, you need to look at examples of dressing rooms in the pantry, and draw up a schematic drawing. It is in it that the number of levels, functional zones, the location of boxes, shelves, rods should be indicated. The space in the dressing room is divided into such parts:
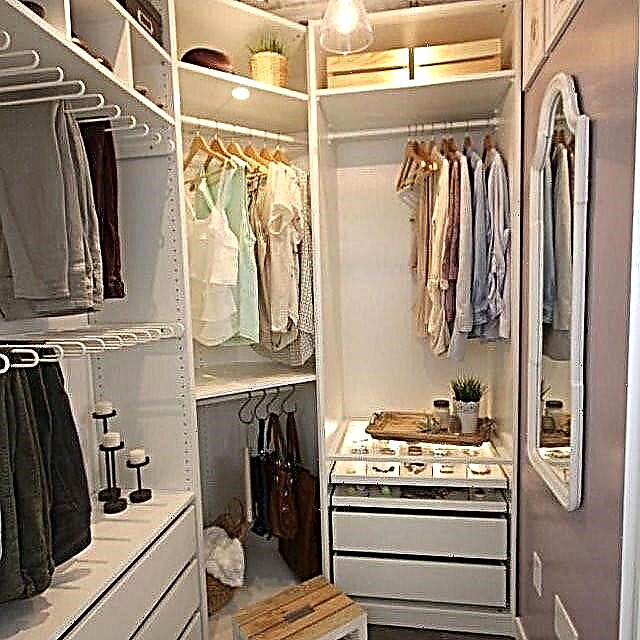
- An active area where things are placed for permanent use. The optimum height from the floor for the installation of shelves and linen drawers is 1-1.5 m, and for installing the bar for things - 1.5-2 m. For convenience, in this part of the dressing room you can place a pantograph (for outerwear), a pair of pantrousers (for trousers), tie (for men's accessories).
- Passive zone. Shelves in the dressing room are installed every half meter. In such offices, they mainly store seasonal items, bags, and any other items.
Requirements
To decide how to make a dressing room from a pantry on your own, find out if your pantry meets the necessary requirements. They are quite simple, so you can organize a storage system for things even in small-sized Khrushchev:
- a sufficient minimum is considered to be a space of 1x1.5 meters. This space is enough to arrange hangers, shelves and drawers,
- if it is planned to place shelves on only one side of the dressing room, a width of 1.2 meters is assumed. If the shelves will be located on both sides - from 1.5 meters.
The pantry is originally enclosed space. It is necessary to equip a forced ventilation system to prevent the formation of mustiness. If for these purposes the dressing room is equipped with a fan. At the same time, its noise should not disturb people resting in the bedroom or adjacent rooms.
Dressing room will require lighting. Without it, it will be very inconvenient to search for necessary things and restore order in a limited space. Lamps should not heat up, otherwise things can spoil. An ideal option for the dressing room will be lighting based on LEDs.


The choice of finishing materials
Do-it-yourself wardrobe rooms from the pantry will turn the photo into a cozy storage for things, if you choose the right decoration. The main requirement for the choice of finishing materials is a smooth surface to avoid puffs and no marks. You should immediately leave the idea of whitewashing a dressing room or cheap, low-quality paint, wallpaper that, when in contact with the fabric, can leave traces that will be difficult to get rid of.
Among other things, it should be borne in mind that things can be hung poorly dried. This can affect the coating, and even cause a musty smell and the development of mold inside the dressing room. Wood and MDF are an excellent option, as they are porous and have the ability to absorb moisture.
The surfaces of the inner space of the former pantry should be easy to clean, wash. Modern paints have all the necessary properties and are hypoallergenic, do not leave a smell.
Give up the idea of flooring in the wardrobe of the carpet, because if you can’t clean it, it will become very difficult to replace it.


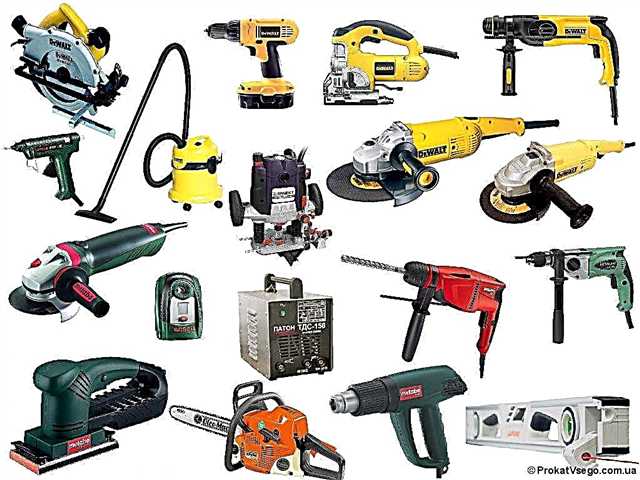
Tools
Getting started, prepare in advance all the necessary tools that you may need:
- drill, drill
- hammer (better rubberized for wood),
- sandpaper,
- screwdrivers
- plane,
- roulette,
- screws, dowels,
- chisel,
- square, pencil, marker,
- construction level,
- jigsaw for cutting blanks.
To paint the surfaces inside the dressing room you will need a paint tray, a roller, flat brushes, gloves.
Space preparation
Before the dressing room with their own hands will be brought to perfection, serious preparatory work remains. It is necessary to free the pantry from the contents. At the same time, they recommend immediately getting rid of the old trash and what was not useful:
- the old closet door is removed from the hinges,
- if the walls have a strong curvature or irregularities, then they must be leveled, plastered. This is important, since distortions can lead to deformation of the box structure or incorrect removal of parameters,
- if size permits, the shape of the future dressing room changes with the help of drywall constructions - it can be a linear option or a U-shaped,
- putty, paint, put the ceiling in good condition,
- level the floor, lay the intended coating - parquet, laminate, linoleum.
If according to the plan you have cabinet furniture installation inside the dressing room, then you should not spend money on expensive finishes, because it will not be visible behind the furniture.


Measurements
How to make the dressing room from the dressing room closet really functional and convenient? First you need to make the right measurements to calculate the parameters and the amount of required materials. This part of the work is done using a tape measure and marker. Labels must be applied carefully so that after completion of work they are not visible.
Before you begin, draw a plan for the future design. Parameters to consider for the height of the planned elements:
- linen - 20-40 cm
- blouses, shirts - 100 cm,
- outerwear - 150 and more.
The depth of the compartment is calculated based on the size of the shoulders, plus 10 cm. The width is set based on the number of items available.


Blanks
Having made all measurements and made a drawing, proceed to the preparation of blanks for the manufacture of shelving. Saw the material strictly in accordance with the technology and according to the measurements. Drywall is used for zoning the space, but for the direct manufacture of shelves it is not recommended, since the plates tend to deform already under their own weight.
Wood, chipboard, chipboard are more resistant to moisture and damage. When cutting workpieces, remember that these materials require additional edge processing.
When cutting, do not try to make the shelves too wide. The arrangement of things in 2 rows is inconvenient with daily use and sooner or later lead to confusion. The optimum depth is up to 60 cm. In a small space, drawers and shelves with telescopic mechanisms have proven their worth. It is better to give preference to such a solution.
Zoning
In the dressing rooms from the pantry, the photos of which are collected in a selection, zoning of space is clearly traced for further distribution and storage of things. From the point of view of ergonomics, there are 2 options for how to equip the space: horizontal and vertical zoning.
The horizontal type is characterized by the allocation of active and passive sections. Distribution is carried out according to the principle of the frequency of demand for things:
- everything that is rarely used is determined in the passive zone - shelves that are located at a height above 2 meters, or below 0.5 meters. This is a place to store household items, seasonal items and suitcases,
- the active zone is a distance of 50-130 centimeters above the floor surface. Here is a place for linen boxes and baskets.
Clothes rods are fixed at a level of 130 to 190 cm from the floor. If the wardrobe has long clothes on the floor, then it is placed on special bars.


Surface finish
The dressing room from the pantry means that the converted space will need surface decoration. No whitewashing, otherwise clothes will be constantly dirty. The easiest option is painting. The obvious advantage of this choice will be the simplicity of color change events and further care. Modern paints are easy to wash, fit well on the surface, they can be tinted in any shade. There is no need to repaint the dressing room in original colors. It is recommended to give preference to shades that differ from the color scheme of the main room by 1-2 tones. Give preference to light colors, so a small storage room in a panel house will be visually larger and lighter. Dark color is undesirable, no matter what is said about its practicality. And without that, a small space can easily turn into a gloomy closet. Another advantage of this choice is that in the future the walls can be refreshed without dismantling the shelves. It will be enough just to cover them with a film and paint everything anew.
Wallpaper is also an affordable option, which is often used when they want to remodel a pantry into a dressing room. Use the washing option. It should be noted that due to the special microclimate and the abundance of clothing, wallpaper can deteriorate and change its color. Therefore, you need to choose those options that you are sure of quality, otherwise cosmetic repairs will have to be done in the near future.
Do-it-yourself photos of dressing rooms from the pantry sometimes show very original finishing options using this type of material. MDF panels are well washed, aesthetic. Only you need to remember that their installation requires the manufacture of a frame from a metal profile or bars. Such a design will take up a certain amount of space that a small pantry simply will not allow.
When making a dressing room with your own hands from the pantry, take care of the flooring. If possible, then let the floor in the dressing room be from the same material as in the main room. Preferably, it is parquet, laminate or linoleum. Carpet or other carpet is not the best option in this case, since it may be difficult to clean it.
To arrange the ceiling in the dressing room instead of the pantry, you can do the usual painting in bright colors, if we are talking about the budget option. You can also install a small stretch ceiling, which perfectly fits the much-needed spot lighting.


Methods of fastening shelves
A do-it-yourself wardrobe room from the pantry is unthinkable without reliable shelves that can withstand boxes with things, shoes, hats.
There are 3 options for the implementation of fastening shelves:
- making a wooden frame from a bar,
- metal corners
- fastening with dowels.
You can choose any option, but dowels are considered less preferred. The shelf mounted on the protruding part of the dowel can easily roll over. A bar structure or corners is a more durable and reliable option for a dressing room.
In the manufacture of the frame, the finished structure is strengthened on the wall in places where marks were previously made with a marker. Use special glue or self-tapping screws and a screwdriver. It is necessary to constantly monitor the installation process and the location of the structure using the building level. The second step is to install the shelves, not forgetting to process the edges in the places of cuts, in order to prevent damage to clothing in the future.
Having given preference to self-tapping screws, it is required to pre-drill holes in the marked places. If the shelves are attached to a wooden base, then everything is mounted directly to the wall. If not, dowels are inserted into the holes. To fix metal corners, short self-tapping screws are used. If sliding shelves are planned for the dressing room, then guides for the roller mechanism are attached to the corners. So that the fasteners do not stand out, they can be covered with putty or hidden under by gluing decorative overlays.
In stores, you can also choose the so-called mensolo and shelf holders:
- the corner leads in installation speed and maximum load,
- FIX fasteners - for a neat, aesthetic appearance and ease of dismantling if necessary,
- Pelican fasteners will also provide aesthetic appeal and will be suitable if materials of different thicknesses were used for shelves.
Choose options that best suit your needs and skills.


Boom fixation
A small dressing room is unlikely to allow a large number of rods to be installed. However, wardrobe rooms will not allow to completely abandon this accessory, because raincoats, coats, dresses on the floor can not be placed on shelves. The male version of the wardrobe allows you to use less space, due to the shortened types of clothing. Here the dressing room from the pantry will allow the placement of at least two bars in tiers.
Installation of the bar for clothes is done after shelves are installed inside the dressing room. Buy fasteners in stores specializing in furniture fittings, where it is easy to choose the most suitable option.
The optimal distance between the shelf and the bar is not more than 5 cm. This is enough to hang clothes and not leave an unused gap. In order to result in the required number of trempels (hangers) being placed on the bar, the width of the installed shelves should be at least 58 cm.
If the dressing room allows, place several rods at different heights. Low rods are suitable for shirts, skirts. High - for dresses, cloaks.
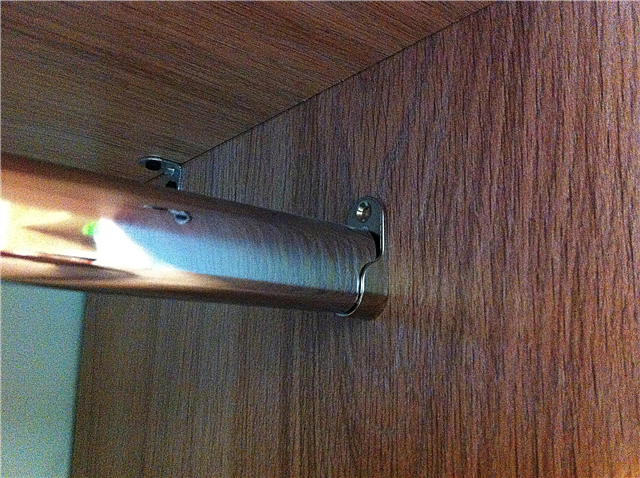
Keep in mind that the tube for the rod has a standard length and it will need to be adjusted to your measurements. To saw off the desired segment, use the angle grinder, or angle grinder.
Fixation brackets sold separately. On 1 bar they need 2. Make a preliminary marking of the places where you will fasten them using a tape measure and marker. You will need a screwdriver and wood screws for installation. After fixing the brackets, a rod is installed in them.


Lighting
Wardrobe from the pantry does not imply natural light. How to equip a dressing room so that it is easy to find everything you need in it? A lighting system is being made for a small enclosed space.
This means that compact ceiling lights or lamps are mounted that allow a swivel base in the structure. Lighting elements in the closet closet should be located as convenient as possible so that they are not touched when choosing or trying on clothes.
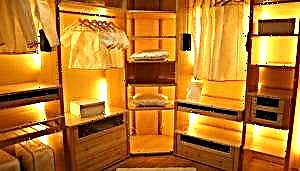
It turns out very cool when equipped with a linear automatic backlight based on LED lamps. The backlight works exclusively in your presence, and there is no need to reach for the switch every time.In the photo of the dressing rooms from the pantry, you can see examples of local lighting for bars with clothes and linen boxes. Tapes made inside drawers make it easy to find even without overhead lighting.
It is better to refuse the idea to use suspended chandeliers and sconces, because they are bulky enough for such a limited space and will constantly touch. It may happen that sooner or later either the appliance or your clothes will suffer.


Door mounting
The door to the dressing room from the pantry is selected in accordance with the dimensions of the future premises and the possibilities of the environment. Now offers a large selection of doors of various configurations. The choice in favor of the door is justified when the dressing room is represented by a separate room. If you need to separate part of the room, then perhaps a partition will be enough.
Having opted for a traditional swing-type door, make sure that there is enough free space before entering the dressing room so that it can be opened. In addition, when installing the door, you need to remember that it must swing open outward, otherwise part of the usable area of the dressing room will be “eaten”:
- installation of the door system begins with marking,
- if installation of guides is necessary, they are fixed on the ceiling or in the opening. In the presence of the lower guide, it is not immediately fixed. At first they simply try on to finally fix after aligning the canvas,
- mounted door mechanism,
- the canvas is leveled in the opening with the help of a building level,
- if necessary, install the lower guide,
- door leaf is installed, adjustment is made,
- the rest of the accessories are attached - brushes anthers for the compartment, clips and more.
When installing the door, blind versions of the canvas are preferable so that outsiders can not observe the presence of things inside the former pantry. Some prefer to decorate the door to the tone of the wall to make the dressing room inconspicuous against the general background of the room.
Additional items
Even if you make a dressing room from a small pantry in Khrushchev, in addition to the standard equipment from shelves, bars and drawers, it is quite reasonable to use modern devices that will make the use of very limited space in a small pantry as efficient and ergonomic as possible. The storage system can be supplemented by the dressing room:
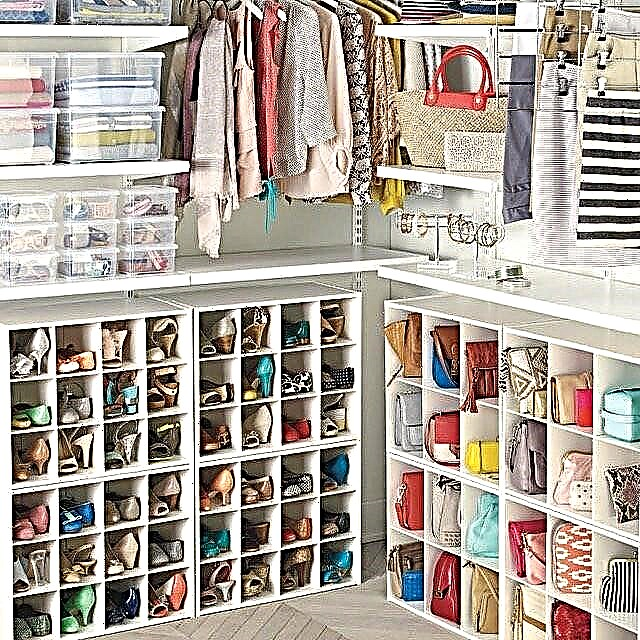
- vertical shoe racks,
- laundry baskets that can fit under the bottom shelf,
- bag hooks,
- all kinds of retractable hangers - for trousers, ties.
The modern design of such auxiliary elements takes into account the needs of a small room from the pantry and allows you to equip the space, even when it is very small.
The idea of remodeling the pantry into the dressing room is a great opportunity to transform the apartment as a whole, freeing up the space that the cabinet previously occupied. Things will be in order, even very small accessories will find a place on the shelves of the dressing room or neatly fit in drawers. Wardrobes of all family members will cease to be a problem and will become orderly in their places.
How to plan a dressing room in the pantry
The arrangement of space directly depends on the shape of the pantry in Khrushchev and on the area. In addition, consider the design of the pantry in the apartment, personal preferences. Among the most common options for organizing space are:
- Linear execution. Racks, shelves, bar are installed in the pantry along one wall. And on the adjacent side they place a huge mirror, hooks or shelves.

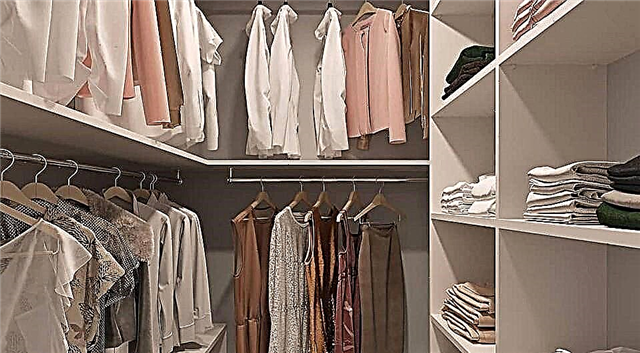
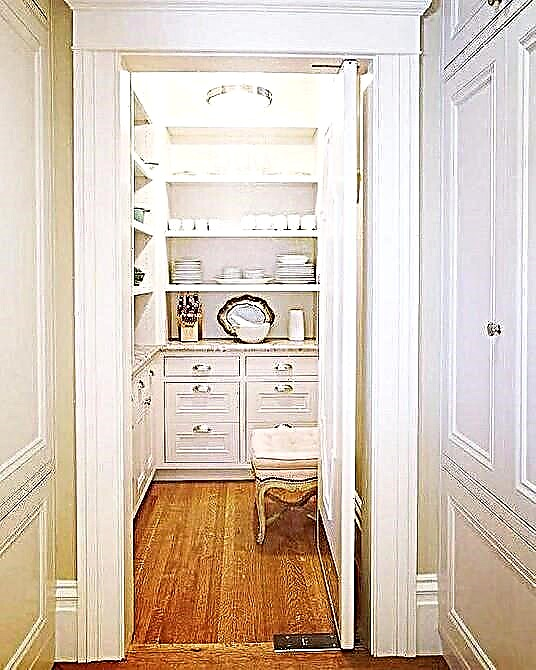
- L-shaped. It should be used if the room is small in size and rectangular in shape. Thanks to such a storage system, it will be possible to use the available space to the maximum, placing both things, dishes, and bedding, as well as equipment.

- U-shaped. This configuration is characterized by increased practicality, the main thing is that the area of the room is from 3 sq.m.


The device of the wardrobe room in the pantry
Of the existing types of wardrobe systems, it is worth noting the following types:
- Cabinet. Make to order based on the sizes provided by the client. This dressing room is quite roomy, but its drawback is the presence of multiple shelves and drawers. They occupy all the free space, and in the future they simply will not succeed in changing anything.

- Mesh. Differs in universality, compactness. The design consists of metal shelves, baskets, which are mounted to the wall by means of hooks with brackets. Installation of the system is carried out without any difficulties, if necessary, it can be changed.

- Wireframe. It is known to many as the Joker furniture system. Metal racks are attached to the floor and ceiling, and then connected using horizontal rods. Shelves with shelves are already mounted on them.


As for the design of the doorway, there are several original solutions:
- open doorway without doors,
- the presence of a beautiful screen,
- sliding doors.
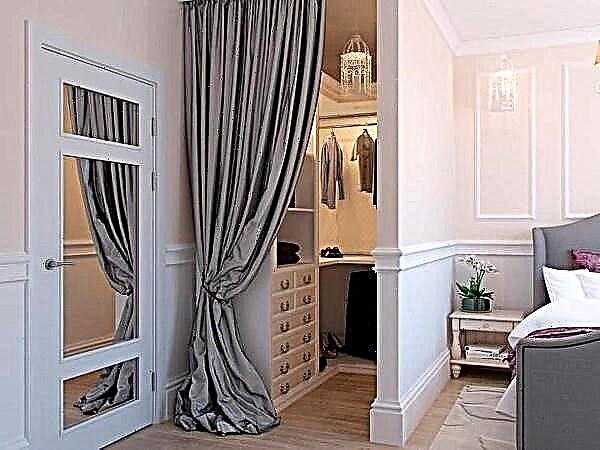
If a screen is chosen to close things in the dressing room, then textiles and curtain rods need to be selected taking into account the characteristics of the interior.
How to decorate a mini-dressing room in the pantry
Not always creativity in the decoration of the dressing room brings the desired effect. It is better to build on the general style in the apartment, everything should be harmonious. It is only permissible to make adjustments to the use of a particular color for decorating walls in a room. The use of a paint of a contrasting shade will be successful.
Use wallpaper for walls in the dressing room is not desirable. In the conditions of temperature changes, they will soon lose both their decorative characteristics and their quality. As a result, the need for repair. A more reliable finishing option is covering the walls with washable paint.
 For wall decoration in the dressing room, it is worth choosing plastic panels, tiles, moisture-resistant paint
Given that the space in the dressing room of Khrushchev is limited, it is worth using light shades for its visual expansion. It is enough to paint them with a difference of 1-2 tones. Coloring the room for storing things in dark colors only exacerbates the situation, the room immediately turns into a pantry, warehouse.
For interior decoration of the dressing room in the pantry, use materials such as paper, fabric, carpet, not worth it. They are characterized by increased ability to absorb moisture, dust particles. It is because of this feature that many designers do not consider them as finishing materials for an isolated wardrobe. It is better to give preference to plastic panels, self-adhesive film, tile, artificial leather.
For the arrangement of the floor in the dressing room, linoleum, laminate is quite suitable. To decorate the mesh elements, it is recommended to use sea pebbles, shells, and deaf details to issue stickers, rhinestones, washable paint.
How to make a do-it-yourself wardrobe from the pantry
It is quite possible to make a convenient and functional dressing room with minimal financial costs. To do this, the following materials and tools can not do:
- building tape
- level,
- pencil / marker
- electric drill (perforator),
- screwdriver
- jigsaw
- self-tapping screws
- metal pipes (basis of construction, holders for hangers),
- chipboard sheets with plastic coating (for the manufacture of shelves, drawers),
- guides
- fasteners (self-tapping screws, various caps, corners),
- edge tape
- hooks
- pens.
Do-it-yourself wardrobe manufacturing technology provides for the following actions:
- Take measurements of the room and plan the dressing room.
- Saw metal pipes according to specific dimensions.
- Prepare the elements from chipboard by treating the edges with an edge tape.

- Install vertical racks in the dressing room, fixing them with self-tapping screws. Install guides and fasteners.
- Place shelves, drawers in the dressing room.
- Arrange inside lighting.
- Install doors, hooks, handles in the dressing room.


How to make lighting in the dressing room in the pantry
Since the dressing room is a completely enclosed space, lighting should be carefully considered. For these purposes, an excellent solution is to use small spotlights. But you can install wall lamps in the dressing room that can be directed in any direction.
Spotlights are compact and easy to install, and highly decorative.
The built-in lighting for clothes looks original. The installation of miniature LED lamps is carried out either to the crossbars or to other suitable structural elements. The main thing is that they do not create inconvenience when laying things on shelves. The use of LED strips for the organization of interior lighting will also be quite appropriate.
Dressing room ideas in a small pantry
To obtain a positive result, you should adhere to the following rules of successful design in Khrushchev:
- A narrow dressing room from the pantry is best done in bright colors, using mirrors. Such techniques make it possible to make the room more spacious.
- It is not recommended to highlight the wardrobe against the general background of the apartment.
- Racks should be placed taking into account the available size of the room. It can be an angular version of the design, U-shaped, linear.
- Lighting should be properly equipped, the main lights should be beaten beautifully with the help of additional ones around the perimeter of the room.
- Before proceeding with the production of a dressing room, it is necessary to clearly determine the size of the frame.
One of the easiest ways to arrange space in the pantry is the presence of many rods, wicker boxes, and in the center - a closet. With this approach, it will be possible to save space for free movement in the room, there will be no shortage of light.
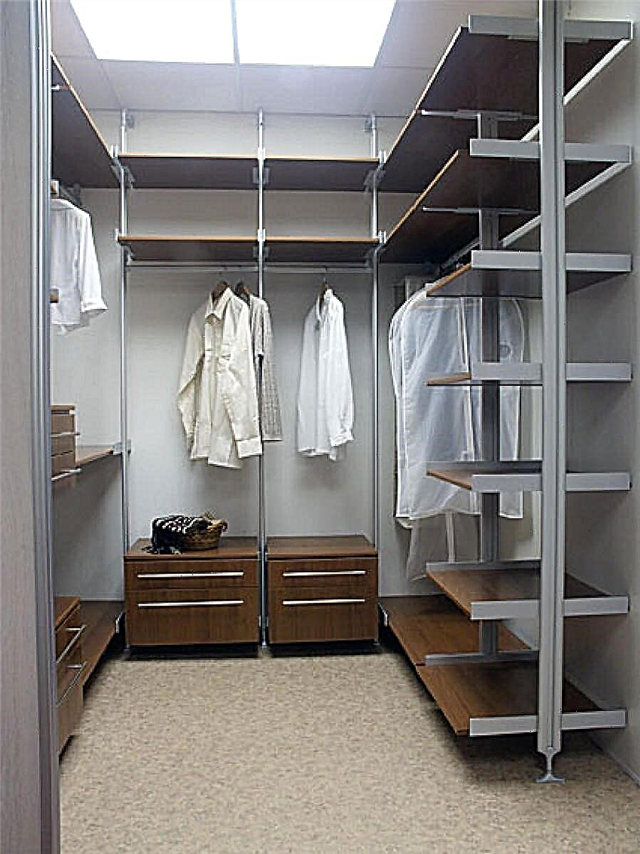
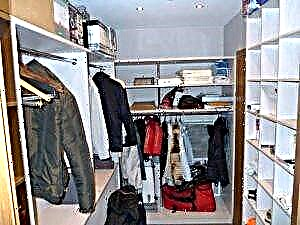
 Setting several levels of zoning makes the room as functional as possible
Another idea is to use a metal constructor. It is enough to purchase a standard frame, install it as desired.
The corner option is both economical and spacious. You can easily do with seven boards, metal pipes and one bar. There is no need to install shelves, drawers, hangers. Such a compact and multi-functional design is perfect for a dressing room in Khrushchev.
Useful Tips
To enhance both the decorativeness and functionality of the storage room in the pantry, the following recommendations should be observed:
- Doors can be decorated with a mirror, both with drawings, and without them. You can also select them if the canvas is made of chipboard. Glass doors decorated with a pattern or made of frosted glass look very stylish. An excellent solution is the combined options where they connect the sheets of chipboard with a mirror, chipboard with glass. Doors from bamboo and rattan look interesting.
- Before proceeding with the manufacture of a makeshift design, it is necessary to think in advance whether only things, or even household appliances, cleaning equipment in the apartment will be stored there.
- A good lighting system in the room allows you to create not only a cozy atmosphere, but also make it more practical.
- Additional equipment for compact storage helps to modernize the room. This is a coat hanger with several crossbars, devices for storing ties, belts, costume trousers, skirts.
- The presence of modules, drawers for shoes at times increases the useful area of the pantry. You can also use hanging shelves, wicker baskets. The mirror in the dressing room must be present without fail.
Photo of dressing rooms in a small pantry
Interesting ideas of a mini-dressing room in the pantry are presented in the photo.
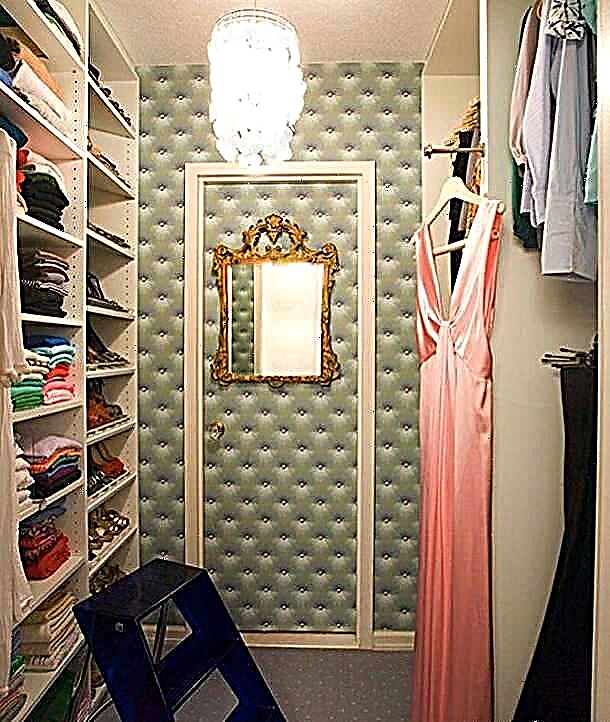
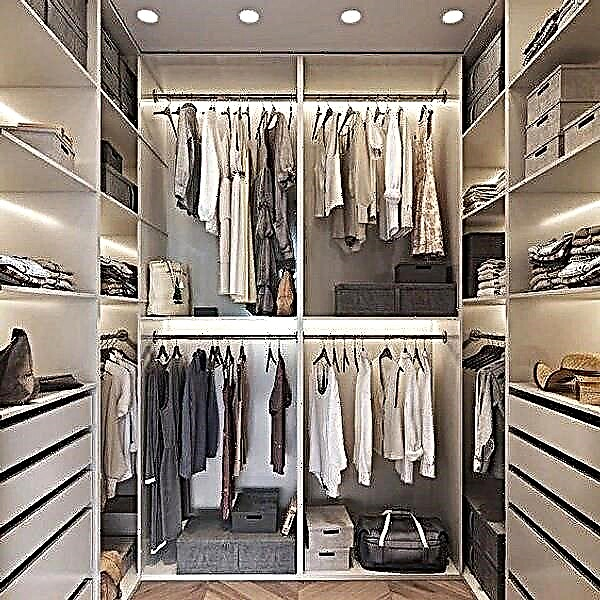
 A properly organized dressing room allows you to place shoes, clothes, and various accessories in a small area
  Light shades selected for wall decoration in the dressing room allow you to visually expand the room
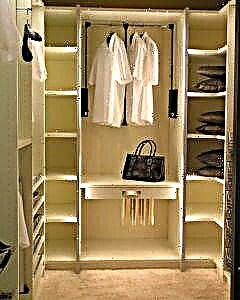
 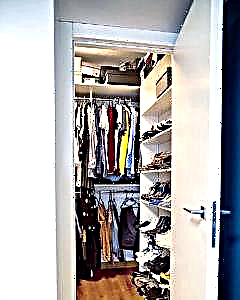 The presence of many shelves and bars makes the dressing room in the former pantry more practical, roomy
  L-shaped design allows you to make the pantry in Khrushchev more comfortable and modern
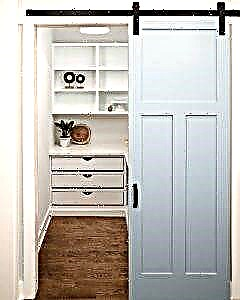
 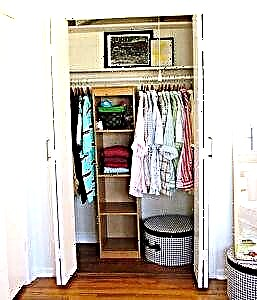 The presence of doors in the storage room provides high-quality ventilation in it
Conclusion
A dressing room in a small pantry with your own hands is an original and functional solution. Everyone can organize such a room if they prepare the necessary materials and tools, a sketch. It is not difficult to choose the most successful option, there are many ways to equip a storeroom in Khrushchev.
Turning the Pantry: Procedure
Turning a closet into a dressing room is not very difficult - there are already walls, a floor, and a ceiling. Only doors are usually to be replaced. They are most often replaced with sliding ones, but regular swing ones are also not bad. The rest of the room is just being repaired. Repair can be done using inexpensive materials, and the main amount will be sent to filling for the dressing room. Such a distribution of funds will be more reasonable, since it is the shelves-cabinets-drawers that provide convenience, and not the walls finished with expensive materials.
Even a small space can hold a significant amount of things 
The procedure for turning the pantry into a dressing room is as follows:
- We remove everything that is in the pantry. All shelves, hooks, furniture, if any.
- We dismantle the door and door frame. At this stage, it is necessary to decide whether the doors will be the same width or whether the doorway should be expanded, in addition, they will be oar or sliding.
- Next, you need to decide exactly how you will repair the walls in the future dressing room.
- If the walls are very curved, problems can arise when installing cabinets. In this case, it is better to knock down the old plaster, plaster everything on the lighthouses, finally smooth it with putty.
- If the walls are relatively smooth, without large differences (up to 1 cm), you can do only with plaster, having previously removed the finishing materials (whitewashing, the paint is cleaned to clean plaster).
- Another option is to simply refresh the finish: stick wallpaper, paint, and correct any irregularities when installing the equipment (an option for those who can find a way out of any situation, since there will be a lot of trouble).
- We put in order the ceiling. It is usually painted or bleached, so it usually just refreshes the finish.
- Install new doors.
- Next, we tidy up the floor. Refresh paint or lay linoleum, you can use vinyl tiles. More expensive materials do not make sense.
Wardrobe in the pantry is made by 50%. Repair work is completed, you can start filling the wardrobe. Here the nuances begin, as the “contents” depend on the location of the dressing room and the things that you plan to store in it.
Dressing room width and door layout
As already mentioned, the doors to the dressing room can be oar or sliding. Sliding is good because it takes up little space when open. With a sufficient width of the doorway, they can be bivalve (or even tricuspid), when opened, one part can "call in" to the second or all can be moved to a free section of the wall nearby.
Two types of doors to save space - sliding (sliding) and a book 
The cloakroom in the pantry can also have swing doors. They are not so comfortable, but they cost less. If you decide to install swing doors, you need to think about the place of their installation, take into account ease of use and safety.
In general, it is more convenient if the doors to the dressing room are sliding (such as a compartment) and wide. If the storage system is built "from scratch", the doors are most often made to the full width of the room and it is the sliding system.In the closets, the doors are often narrower - 60-70 cm. It is hardly worth doing hinged much wider, since the useful space is “eaten up”.
In a narrow dressing room
A little about where the swing doors should be located if the dressing room in the pantry has a small width. If the room has a width of 135-145 cm, the best option for installing swing doors is 10 cm from the left wall, with opening inward. Given the installation of a casing, 5 cm wide, there will remain a gap of 5 cm wide to the wall. This looks normal and there is a space 55 cm wide on the right, in which the storage area is equipped - shelves / hangers. But it is sold in rooms with a width of at least 135 cm.
With the width of the former pantry from 135 to 150 cm 
If the width of the pantry is even smaller - about 130-120 cm wide, you can slide the door close to the wall or even remove the platband from the side of the dressing room. It is not technologically advanced and not very beautiful, but usability is much more important.
In very narrow rooms 
In order to prevent things from blocking / opening doors with such a layout, a shelf zone is installed at the entrance, the width of which is 30-40 cm. Here you can store shoes in boxes, place drawers for underwear and small things, shelves for sweaters / jumpers, etc. Further it is already possible to arrange a storage area on hangers 60 cm wide.
At medium width
With the width of the dressing room in the pantry from 150 cm, you can arrange a two-sided storage system - to the right and left of the entrance. In this case, the doors are positioned so that on one side there is a distance to the wall of 55 cm (taking into account the installation of the door frame and the casing, it will turn out 60 cm). Here you can place a zone with hangers. On the other hand, make shelves 30 cm wide over the entire wall.
This layout is maintained up to a room width of 175 cm. Another arrangement in this case simply does not work. So if your dressing room in the closet has a width of 150-175 cm, just change the width of the shelves, leaving a passage of 60 cm wide. By the way, if the tenants are large, you can leave the width of the shelves the same, and increase the passage. In this case, a large person will be more comfortable.
For wider closets
With a width of 175 cm and more, hangers can be placed on both sides, taking 60 cm to the right and left under them. In this case, the pipe for storing things on hangers is placed at a height of 200-210 cm, a wide shelf is made above it to accommodate dimensional and rarely used things (spare pillows / blankets, suitcases, seasonal clothing).
At a height of 50-60 cm, shelves or drawers are installed under the hangers for storing things, shoes. With this option, usually the doors open outward. Otherwise, in the open state, they block access to part of the clothes. But, if the dressing room goes into a narrow or dark room (corridor, for example), the doors should open outward. Because it is highly likely that forgetting to close the doors, you can crash your forehead to the end of the ajar door. This is much worse than inconvenience.
Layout with three-way storage areas 
With a dressing room width of 2 meters or more, you can already do three-way placement of things. To do this, make three cabinets with overlap - one cabinet closes the other. In this case, the left area is shorter, a second cabinet is placed, the length of which is 60 cm shorter than the width of the pantry. And only the area to the right of the entrance takes place from one wall to another (see the figure above).
Why do you need to do just that? Because if you are right-handed, then in order to get to things located in the overlapping zone of cabinets (in the corners) you will need to push things away and it is more convenient to do this with your right hand. Left at this time you will remove the desired hanger. On the contrary, for the right-hander this is inconvenient.
Location of the pantry / dressing room and its filling
Filling for wardrobes - shelves, pipes for hangers, drawers and a number of special devices such as hangers for trousers, skirts, ties. These devices help to rationally use the space, but are expensive. Therefore, with a limited budget, the dressing room in the pantry perfectly costs only the standard content.
Different devices help organize storage 
Near the front door
If your dressing room in the pantry is near the front door, it will most likely be stored in seasonal clothes and shoes, hats, gloves, etc. Filling is selected in this case, respectively. A pipe will be needed to hang outer clothing. The height of this compartment is 3/4 of the growth of the hosts. If space permits, you can allocate space for storing jackets, jackets and other similar clothing. The height of this branch is 1/2 of the growth of "users". In the lower part, a place for shoes is surely reserved. Here it is stored without boxes, so you need to come up with some devices (do not forget about the department for boots with long legs).
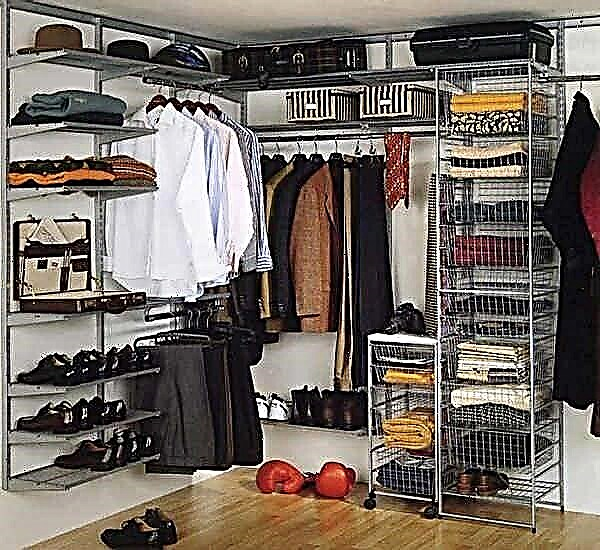
Examples of filling with different layouts 
In the upper part of the small dressing room at the entrance, shelves for storing hats are made. There you can send small bags. Still need a couple of boxes for small things and haberdashery. If there is room, you can allocate a long narrow compartment for storing umbrellas.
In the bedroom
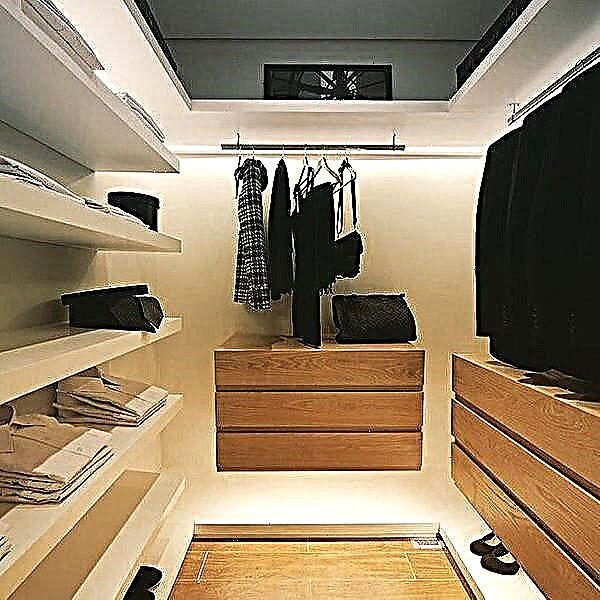
If one of the walls of the former pantry goes into the bedroom, the filling in the closet from the pantry is selected differently. For the most part, this will be the entire seasonal wardrobe - everything that is worn at the moment. Therefore, more branches are required. For dresses, suits, skirts and trousers, compartments with hangers are needed. With a sufficient ceiling height (2.5 - 2.7 m), you can arrange two compartments for storing things on hangers: one above the other. In the lower part you can install a regular pipe, in the upper it will be more convenient to pantograph. A pantograph is a tube equipped with a mechanism that allows it to be lowered and raised.
It is more convenient to make a compartment with a lowering pipe on the side wall, but only if the width of the former storage room allows the pantograph to lower. If not, transfer this section to the wall opposite the entrance.
Wardrobe in the pantry: wire boxes and shelves made of chipboard 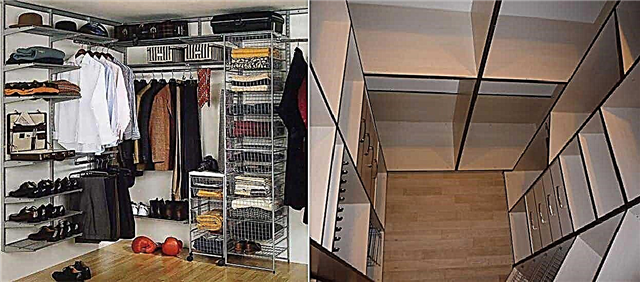
For a small dressing room in the pantry, the wall of which opens to the bedroom, it is worth installing several open shelves for folded things - sweaters, sweaters, t-shirts, etc. Less cumbersome and more convenient are wire boxes or shelves. They save space, besides it is better to see what lies in these drawers / shelves.
Necessarily still need boxes for linen, socks and other such small things. They can also be wire, but this does not affect convenience. Perhaps it will be even uncomfortable for some that the laundry is visible even when the drawer is closed.
With a large number of shoes, all of it is not placed near the front door. Then more shelves for shoes are needed. But usually here shoes that are worn infrequently are kept here, so they are put in boxes. For their placement, usual shelves with a width of 35-45 cm are suitable. In this case, all the boxes will be in sight and it will be convenient to get them out. To reduce the cost of the project, instead of shelves, you can strengthen two pipes on which the boxes will be placed. It is convenient, inexpensive, and everything is clearly visible.
Planning principles
First you need to analyze the number of items that you plan to store. Divided into types: those that hang on hangers are on shelves or in boxes. Clothing that is used this season should be at hand, the rest is put away.
Now you need to draw a layout plan for the elements of the storage system. The quantity of materials purchased and the list of necessary tools depend on how accurately it will be drawn up. It is better to lay in the project a few additional shelves or drawers that may come in handy in the future.

Getting to the alteration of the pantry, it is necessary to think over the ventilation method in advance. Things absorb odors and moisture, so airing will not only provide an influx of clean air, but also keep clothes from musty and mold. A conventional range hood or air conditioning can handle this task.
Good ventilation reduces dust settling on things, protects against moths and other pests.
An important component is lighting. Here you have to look for things, often try on them, so there should be enough light. Spotlights, LED strip around the perimeter of the ceiling or floor, wall sconces, clothespins - the choice depends on the style that is planned for the dressing room. To the place there will be lamps with motion sensors - the light turns on when the door opens, and goes out when it closes.
Location of racks in the closet in the pantry
The layout of the shelves depends on the size and configuration of the storage room. There are several types of standard schemes: angular, linear, U-shaped, parallel.
The corner is located along two adjacent walls. The design is quite roomy due to the use of a large number of drawers. On a loose wall you can hang a large mirror.
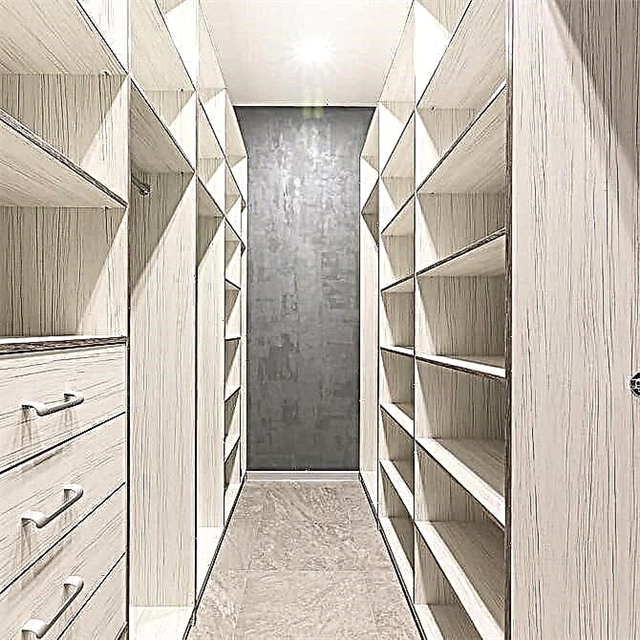
For linear you need a minimum of 2 square meters. m. Racks are located along one side of the room. The opposite can be decorated with mirrors. So visually the room will seem larger. In such structures, roll-out stands are widely used. They are convenient to use and, when unnecessary, easily slide back under the shelf.

For the U-shaped requires an area of 3 square meters. m. It is important to consider the distance between the walls in order to move freely around the room. The minimum distance between the shelves is 80 cm. If the room is narrow, it is better to drawers in the end part.


For parallel, you need a fairly spacious pantry. In fact, these are two linear racks located opposite each other. It is convenient to divide such a room into female and male halves.

Division into dressing room areas from the pantry
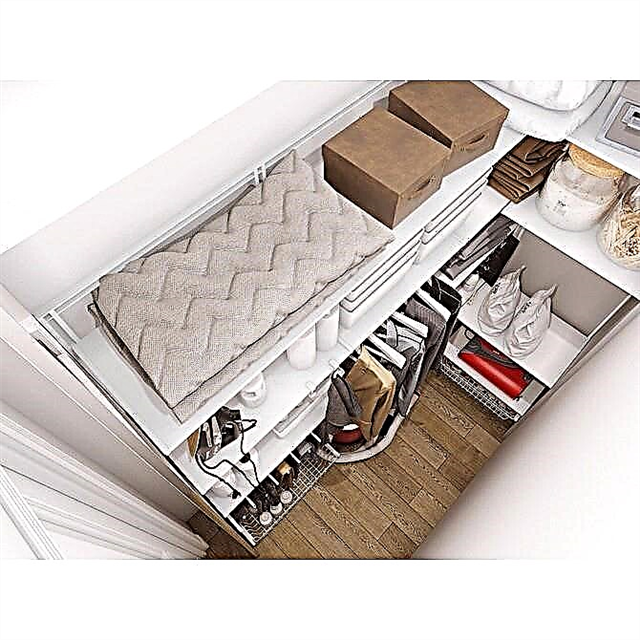
The storage system is usually divided in height into zones: upper, middle and lower. In the upper (above 2 m) is off-season clothing and rarely used items. Most often these are shelves, open or hidden behind the doors. To reach this area, you will need a stepladder or stand.

In the middle (from 60 cm to 2 m) is the clothes that are worn this season and hats. It is represented by shelves, drawers and rods. Drawers are best done below chest level so as not to obstruct the view of the contents.

In the lower zone (up to 60 cm) shoes are stored. For her, roll-out cabinets or a separate shoe rack with inclined shelves are suitable. Tools, sports equipment, or household appliances such as a vacuum cleaner can also be stored in this area.


Internal organization
The wardrobe from the pantry in Khrushchev can be of different types: frame, panel, mesh and cabinet.
Frame - a complex of metal racks. A kind of skeleton on which shelves, rods, rails and baskets are hung. The holes on them allow you to mount the modules at different heights, in the process of using add new elements. This design is inexpensive, easy to assemble, it can be dismantled and moved to another place.

Panel - these are special panels that are mounted to the wall. All storage elements are installed on them. This is a more expensive wardrobe option, but it looks luxurious. Most often it is made from particleboard, MDF and veneer of different types of wood.
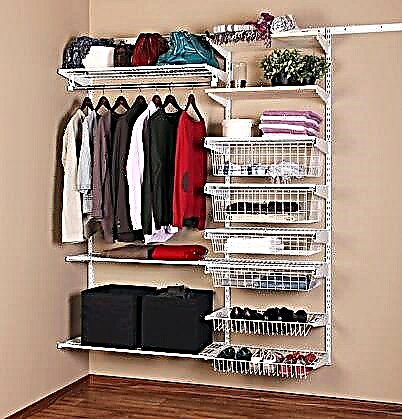
Mesh - these are metal shelves and baskets that are mounted using rails on the wall. Easy installation, multiple combination options and visual ease make this system very popular. An additional plus - things in such grids are ventilated.

Cabinet - these are furniture modules interconnected. Most often produced from particleboard or MDF. They are solid and roomy, moreover, affordable. The only drawback is the inability to rearrange the modules.
Filling a small closet from the pantry
Depending on the chosen style, the filling elements are made of different materials: wood, chipboard, metal, plastic.
Shelves are open and closed. Their depth is best done no more than 60 cm - this is the average length of a person’s hand. If they are deeper, getting things out of there will be inconvenient.
The upper tiers can be made wider than the lower. The main thing is to correctly calculate their height so as not to hurt your head. It is convenient to store travel bags, boxes with toys or other voluminous rarely used items there.
The rods are made for each type of clothing: coats, dresses, shirts, trousers and skirts. They are located at different heights. It is permissible to place them in the upper zone, choosing retractable varieties with a pantograph. With it, you can lower the entire bar.

Boxes for small items are supplemented with dividers to avoid confusion. They can be extended to different depths, but not less than 30 cm. Depending on the chosen style, you can design them with original handles or do without them at all, leaving for convenience opening the recesses at the top of the panel.
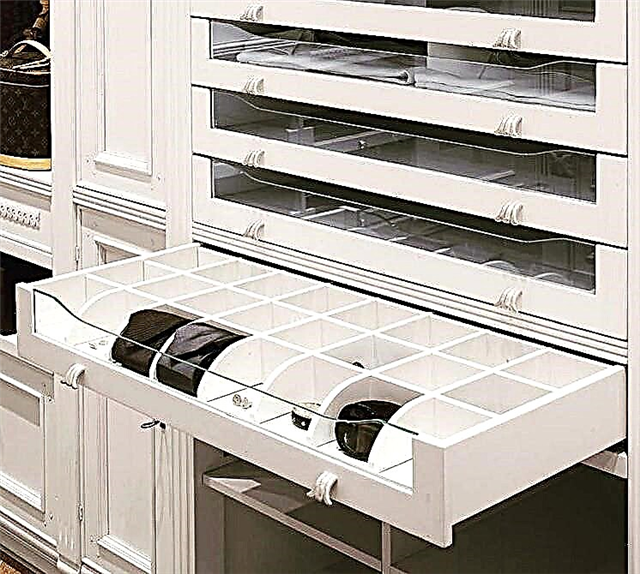


Baskets, boxes and containers are an indispensable component of any storage system. Baskets are most often taken metal. Unused shoes for this season are stored in cardboard boxes. For ease of search, tags with a description of the contents are pasted on them. In plastic transparent containers of different sizes they store small things. It’s convenient: you can see what lies inside.

To save space, fabric pockets are suitable for storing small accessories. They can be made in the same color scheme as the main design, or choose a contrasting shade. They can also store emergency sewing kit or clothing brushes.

Hooks for umbrellas, hangers for belts and ties are small, but very convenient devices that allow you to maintain order even in a tiny room.
Mirrors are an important part of the inner filling. There must necessarily be a large mirror in which you can examine yourself in full growth. In addition to it, you can add several smaller mirrors. So they will not only visually expand the small room, but will also allow themselves to be seen during the fitting from different angles.


If the area allows, you can put here a chair, ottoman, an unusual shape chair and put a small rug next to it.

Depending on the chosen style, the doors are usually swinging, coupe or in the form of an accordion. The last two species completely open the view of the room and serve as an interesting decorative element. Choosing a facade suitable for the rest of the interior, you can fit the former pantry into the overall design of the house.

If the door leaf for some reason does not fit into the design concept, then the entrance can be decorated with a beautiful arch. Curtains always look advantageously in doorways. You can play with color, textile density, try different options for drapery. At the peak of popularity, photo curtains and decorative threads are now.
All elements of the system that come in contact with clothing should be carefully processed, without roughness, so as not to make clues on things.
Necessary materials
To begin to equip the dressing room in the pantry, you need to free it from things. If necessary, make cosmetic repairs: equalize the walls and floor.
Finishing materials are selected taking into account the specifics of the room. A jacket wet after rain, boots stained in autumn slush - all this brings dampness and dirt. Therefore, it is better to finish wall panels and floors with materials that are easy to wash and clean. At the same time, the room should have good air circulation, so it is better to choose breathable materials.
It is better to paint the walls with water-based paint of the desired shade. As an option - paste over with washable wallpaper. Laminate, parquet board, linoleum, and ceramic tiles are laid on the floor. They are not advised to put carpet on the floor, as it collects dust.


For shelving choose the material to your taste: wood, plywood, particleboard. If you have old unnecessary cabinets, you can build a system of parts. It will be unusual and not so expensive.
Installation of a storage system
Furniture forums often discuss the question of how to make a dressing room with your own hands out of the pantry. Experienced furniture makers say that the most important thing is to decide on its type. If this is a wireframe option, then, taking as a basis the prepared plan of the racks, you should calculate the right amount of materials. Their approximate list:
- metal pipes are useful for racks and rods,
- Chipboard - the main material for shelves and drawers,
- edge tape for processing the end of the plates,
- guides and fasteners (screws, hinges, corners),
- accessories (handles, hooks).
Pipes are better to use chrome. It is most convenient to use pipes with an outer diameter of up to 25 mm. Particleboard is better to take laminated, with a matte or glossy finish to choose from.

Next, proceed with the installation of the system:
- they cut the pipes into pieces of the desired length,
- Saw DPS for shelves and process sections with tape,
- install and fix vertical racks, guides and fasteners,
- place shelves and drawers in their places,
- they hang doors and fix fittings.
When mounting the mesh structure on the wall, a supporting element is attached. Vertical guides from aluminum profiles are hung on it. Then they attach the remaining elements of the system: baskets, rods, hooks.

Decor
When decorating a room, one should not forget about its external attractiveness. The aesthetic component of shelving affects mood. If the morning begins with a cozy comfortable room for clothes, then the day will surely be successful.
To decorate the room using cornices, plinths, carving. Sandblasted drawings are applied to the mirrors. You can experiment here with photo wallpaper or decorate the walls with reproductions of paintings. The contrasting backlight, which is aimed at individual compartments, will look original. The appearance of the room may not fit into any specific style, the main thing is that it pleases the eye and improves mood.
The working process
Do-it-yourself wardrobe room from the pantry is done like this:
- A project is being drawn up
- The necessary communications are summed up,
- The room is vacated and finished,
- The doorway is made out,
- A storage system is being built.
We will analyze each aspect in detail.
Stage 1 - drafting
At this stage, you need to decide on the configuration of the racks and shelves and their location. The location of the structure can be of three types:
| Illustration | Description |
| Shelving along one wall. This option is suitable for very narrow (less than 1.2 meters) spaces. Shelves are placed along the entire wall, and there is a passage along the length of the structure. It looks like an open cabinet. A very narrow pantry is equipped in this way. | |
 | L-shaped racks. A more rational option, suitable for rooms with a width of 150 cm or more. Usually, a crossbar is placed in the end part for storing outer clothing, or a compartment for storing a vacuum cleaner and other equipment is equipped. |
| U-shaped option. The most functional and roomy solution in which the structure is located along three walls. The configuration of the shelves can be any, the main thing is that in the middle there is a passage with a width of at least 60 cm. |
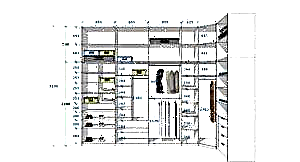
As for filling the wardrobe, it all depends on the type and quantity of clothes and shoes that will be stored. In addition, some items can be stored in drawers or on open shelves. The dimensions of the compartments for different types of things are shown in the diagram below. Based on this, choose the configuration of your storage system.
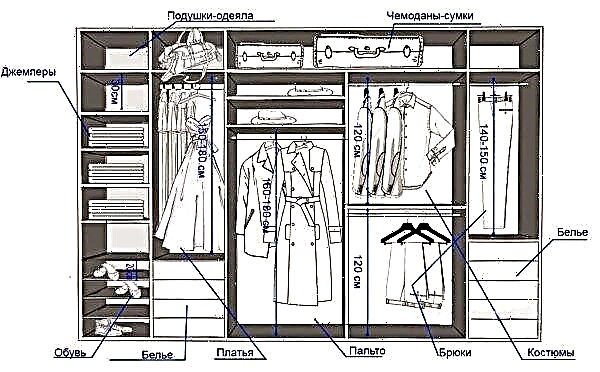
The height of the compartments for different things is different, do not miss this moment
You can make a wardrobe from different materials:
| Illustration | Description |
 | Chipboard. The most common option for arranging a dressing room. You can order items that are already cut to your size and simply assemble everything in place, or you can cut everything yourself (but I advise you to use the finished parts anyway). If you have an old entrance hall, you can adapt it, such furniture is well suited for dressing rooms. |
 | Modular systems. The perfect solution for dressing rooms in our small pantries. A simple design of racks, brackets, shelves and compartments, which are arranged in the order you need and allow you to optimize the system as you need. The only negative is a considerable price, but the convenience is worth it. |
 | Designs from furniture pipes. Another good option, for the construction of which furniture pipes are used. Racks are placed on which shelf holders, crossbars and other elements are mounted in the right places. A simple and interesting solution. |
You can combine different designs in your dressing room, there are no rules. Do as you feel comfortable.
Having chosen the design and material of manufacture, make a sketch of the future storage system. So you will know its configuration and basic dimensions.

The sketch will help to clearly represent the end result.
Stage 2 - laying communications
When a dressing room from the pantry is equipped, wiring and the installation of a fan for forced ventilation are necessary. These works must be done before finishing, so as not to spoil the surface later. The following should be done:
| Illustration | Stage Description |
 | Strobes are made for wiring. You need to pre-mark the locations of the switches and sockets, think over the lighting system, and based on this, make the shtrobes for laying the cable. Do not forget that you need to lead the wire to the installation site of the fan in the wall. |
 | Wiring. At the same time, boxes are placed under the switches and sockets. |
 | A hole is made for the fan. You can drill it using a special crown, or you can drill holes along the perimeter with a punch and knock out a piece of the wall. |
Stage 3 - preparation and decoration
Instructions for this step are as follows:
- First of all, all things are taken out of the pantry.. What is not needed - throw away what is needed - fold it and then place it below the shelves. One way or another, you need to remove everything from the room,
- Walls, floors and ceilings are cleaned from old finishes. If you have an apartment in a panel house, it may turn out that you need to seal the joint between the plates on the ceiling. This is done in advance, using a special composition,

The joints between the plates are sealed with a special compound
- Flooring is laid. It can be either a laminate or a wooden board, or cheap linoleum. You don’t even have to fix it, just cut a piece to the size of the pantry and stick along the perimeter with tape,
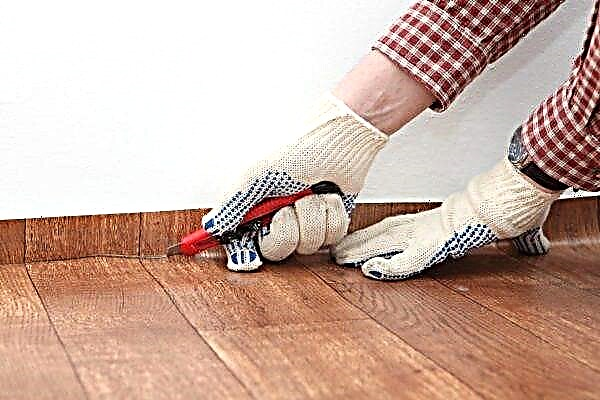
Linoleum - the cheapest flooring material
- The walls are leveled and trimmed. The closet is the easiest to paint. If there are irregularities on the walls or ceiling, then the surface is pre-putty and only then painted. The ceiling is designed in the same way, it is best to use white paint for painting, since the room is small and there is no natural light in it.

You can paint the room in any color.
Use washable paints for work. In this case, the walls will not stain clothes, and if necessary, you can quickly wash the surfaces with a normal damp cloth.
Stage 4 - design of the doorway
You must decide in advance how to arrange the doorway. I suggest choosing one of three options:
| Illustration | Description |
 | Sliding doors. A very practical option that saves space. You can make the doors of the mirror, then they will perform two functions at once. |
| Classic doors. When converting a pantry into a dressing room, you can leave the usual door leaf. The photo shows how it can be upgraded by attaching narrow shelves along the entire height. | |
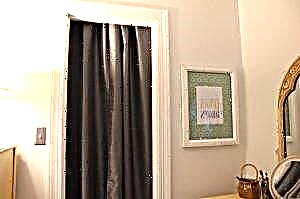 | Curtains. The most budgetary decision you can make in minutes. If this option suits you, then you will spend a minimum of money. |
Stage 5 - rack assembly
The process of assembling furniture from chipboard and furniture pipes is considered in many reviews, so I will talk about the option of arranging a wardrobe room from modular elements:
| Illustration | Stage Description |
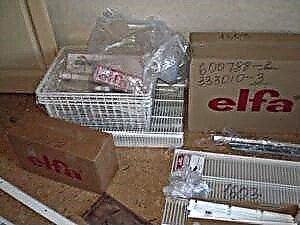 | The kit is unpacked. You must immediately make sure that all the items are in the right quantity and are not damaged upon delivery. |
 | The position of the supporting elements is marked. They are also called rails and are arranged horizontally. There may be two rows of items depending on the load and configuration of your storage system. Before marking, the rail is cut to the desired length and applied to the wall. Do not forget to check its position with a building level. |
 | Holes are drilled. For fastening, dowels 8x60 or 8x80 mm are used. The holes should be 5-10 mm deeper than the fasteners. The work is carried out with the help of a puncher, it is important to keep it horizontal so that the dowels do not get awry. |
 | Guides are attached to the wall. To do this, dowels are inserted into the wall, and then the rail is attached and clamped with screws or self-tapping screws. When mounting, do not forget to check the level of the element. |
 | Mounted guides. They are located either at an arbitrary width, or at a distance of 63 cm, if you will put pull-out elements with a fixed size. |
 | Shelf brackets are placed on vertical racks.. Everything is very simple thanks to the locking system and the holes along the entire length of the structure. |
 | Wire shelves and baskets are cut. To adjust the elements to the required width, they need to be cut with a hacksaw for metal or bite off with special pliers. |
| Shelves. They are neatly located on the brackets. | |
 | Put the rest of the elements. It can be rods, baskets, drawers, etc. |