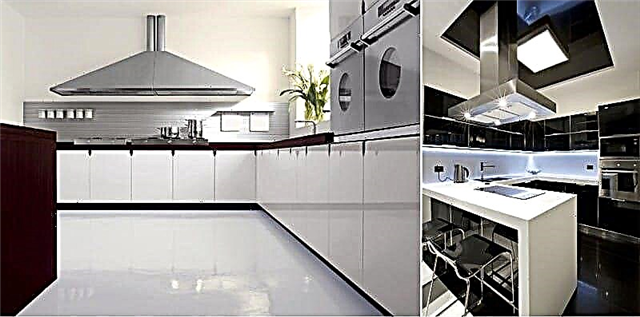
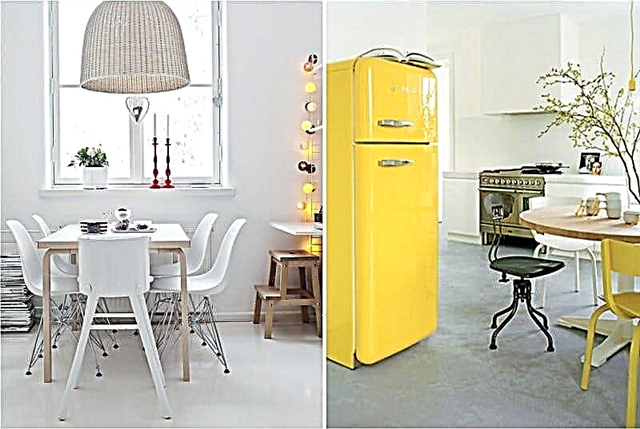
To have a beautiful, comfortable, spacious and functional kitchen is the dream of every housewife. And the top of desires is if it will be unique in style and decoration. The bulk floor in the kitchen is capable of solving this problem. Such a coating can be done by several methods. At the same time, you can get both a popular and modern 3D floor, and a surface using various artistic effects.
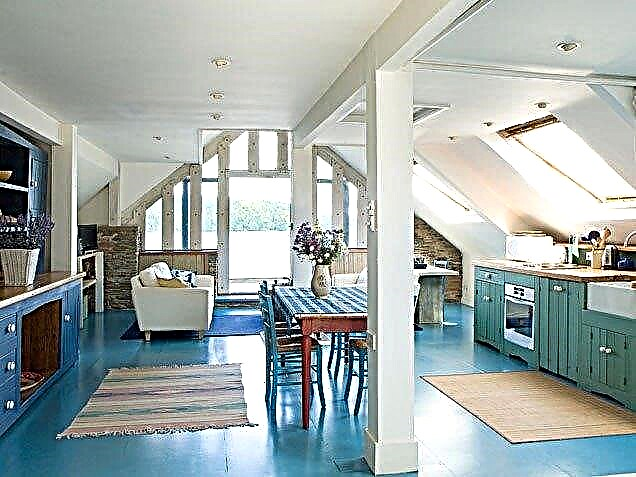
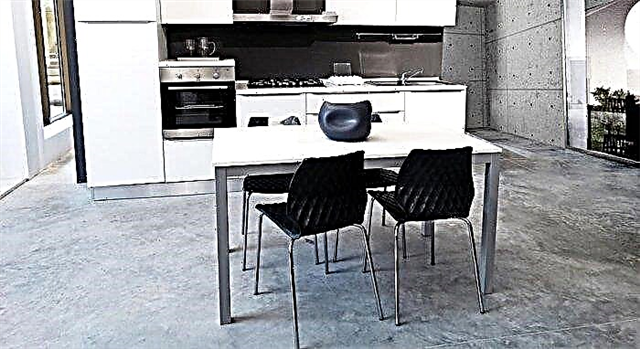
 3D execution in the kitchen
Advantages of the self-leveling bulk floor
If we consider the advantages of using a bulk floor, when you want to design a kitchen, the list will be quite impressive. A few points look like this, unlike the type of bulk floor:
- The surface of the floor is perfectly flat and smooth.
- Durability of polymer coatings will ensure long service life.
- Epoxy bulk floor for the kitchen - the standard of durability. It resists chemistry, ultraviolet, with its help you can create a surface with a pattern or 3D effect.
The leaders in strength and durability are self-leveling floors in the kitchen, created using epoxy-urethate mixtures and methyl methacrylate compounds. Such coverage will last for decades. But its cost is very high.
When choosing a bulk floor, it is worth remembering about some of the user flaws of individual compositions. Polymer mixtures are quite plastic, therefore they can withstand heavy objects, but - small scratches form on them. Epoxy mixtures are very strong, but fragile. In addition, this floor is very smooth and quite slippery. But - completely waterproof, can easily withstand the effects of spilled vinegar or caustic spicy seasoning on the floor.
Complete security and plenty of creativity
It is believed that during solidification and subsequent operation, the self-leveling floor can emit harmful substances. Especially if you spill something hot on it. This myth was formed due to the properties of methyl methacrylate mixtures. They emit an unpleasant odor during setting and require careful ventilation of the room until the final solidification.
After the floor is ready for use, that is, completely dry - it does not emit any harmful substances under any conditions. Over time, polymer and epoxy mixtures do not react with the environment, therefore, no potentially hazardous compounds are also formed. Bulk floor is not harmful to health.
The layer created by self-leveling mixtures has increased fire safety. The liquid mixture is quickly poured, the solidification time is several times shorter than that of concrete-based solutions. Completely finish work in the kitchen in 5 days or less.
For creativity, the self-leveling floors of the kitchen offer the widest possibilities. You can do:
- plain coating
- layer with the addition of flock or special design elements,
- glitter floors
- ornamental or zonal pattern using mineral-containing compounds,
- place a low-detail picture or printed photograph under the transparent layer of the epoxy floor.
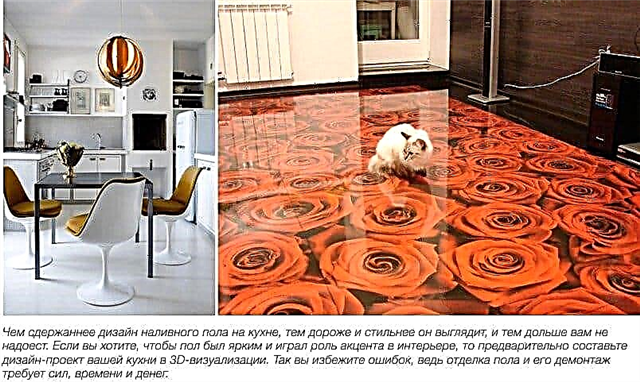
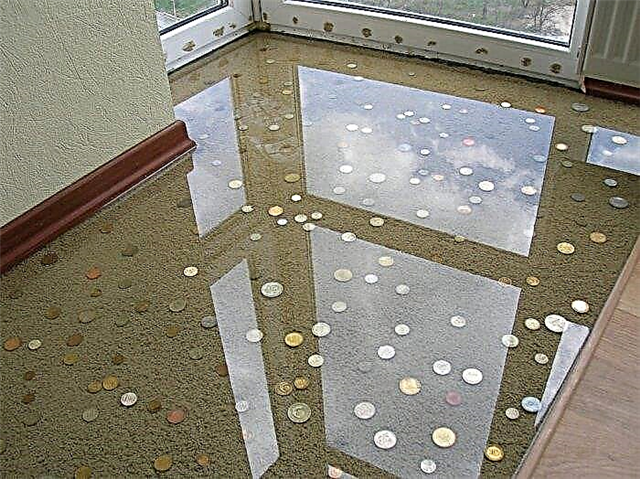
 For a 3D floor, pictures are cut out and pasted onto the floor
The popularity of 3D sex among users is constantly growing. Such an artistic solution allows you to create a single ensemble of kitchen, combining the design of the gables of the headset, photo wallpaper on the walls and the surface under your feet.
There are several ways to make 3D floors. The method of work depends on the mixture used. Some of them allow application on paints, which cover the concrete or wooden base of the fill. Others show good results when covering vinyl-printed photographs. The latter method allows you to create truly spectacular solutions, for example, simulate the relief of a completely smooth and flat surface.
How to choose the type of bulk floor
The main thing you need to know is that a durable and functional self-leveling floor in the kitchen can only be obtained using high-quality mixes. They do not differ in democratic price. Therefore, in order to rationally spend money, it is worth achieving the lowest possible consumption of liquid composition.
This problem is solved by thorough preparation of the foundation. This can be done in many ways, depending on the specific characteristics of the surface of the floor in the kitchen. Sometimes it is beneficial to completely remove and re-create the floor screed or wood flooring. The cost of this work will be less than the excessive consumption of an expensive self-leveling mixture.
A poorly prepared pouring base can cause another problem. In areas where the level of the existing screed is low, an excessively thick layer of the bulk mixture is formed. This may cause clouding, color deviation or an increased risk of cracking. In other areas of the floor where the level is high, a very thin layer of the bulk mixture is formed. This leads to accelerated destruction of the coating.
Some properties of the bulk floor, facilitating work
All bulk mixtures have the ability to completely fill all voids and provide high adhesion to the base of a wide variety of materials. Therefore, they can be poured onto evenly laid, firmly adhering ceramic tiles, concrete, gypsum screeds of pre-leveling, as well as wooden and plywood decks.
You should not rely only on the good properties of bulk mixtures. The surface for pouring should be prepared without fail. Ceramics and other materials with extremely low moisture absorption are primed with concrete contact class compounds. Cement screeds pass twice with primers of deep penetration. For the treatment of wood-containing coatings, special means are used, including those that provide a decrease in moisture absorption.
Preliminary preparation
Before making a bulk floor, you need to prepare a room and a base for pouring. To do this, all the furniture is taken out, the existing floor coverings are removed (except for ceramics, if all the tiles are held firmly and the laying surface is flat), the remnants of the adhesive compositions are removed, dust and debris are swept away, after which wet cleaning is done.
After that, the runout of the heights of the base is measured using laser levels or a long building level. Depending on the quality of the floor surface, the following types of work can be carried out:
- when beating heights in the range of 5-10 mm, you can do cosmetic repairs of the surface. Pit in concrete or potholes in wooden flooring close up. After that, waterproofing is done and filling is carried out. You need to choose a mixture that can create a layer from 1 to 7-10 mm without loss of strength,
- if the runout of heights is within 50 mm, you can not remove the existing screed or flooring. Above them, a pre-alignment layer is created. To do this, it is rational to use self-leveling highly filled mixtures. If you choose a composition on a gypsum basis - it will quickly set and dry, the delay in operation will be minimal.
With a strong level difference, it makes sense to dismantle the existing floor screed and re-create it. This will reduce the load on the floors, with the help of bulk mixtures of the class thick floor, you can level the runout of heights up to 150-200 mm.
 Example of screed requiring dismantling
If the task is to compensate for runout heights greater than 100 mm in houses with weak overlap, a gas-forming plasticizer is added to the bulk mixture for the screed. At the same time, many gas bubbles appear in the layer, which sharply reduces the mass of the screed and the load on the floor.
Features of filling in the underfloor heating system
Underfloor heating structures require special handling. During the pouring of the floor, its setting and final drying, there should not be any mechanical stresses. To do this, proceed as follows:
- Before filling, the system is filled with room temperature water,
- to ensure geometric stability, wait a few hours to ensure that the temperature of the fluid in the tubes equals the ambient temperature.
Pour the floor through the pipes of the heating system should be in small areas. The mixture is carefully leveled with a squeegee and rolled with a needle roller.
It is recommended to follow the general parameters of minimum thicknesses. A liquid mixture based on cement or gypsum is poured into the area of the tubes so that at least 20 mm of the solution is above the heating structure. After this, you can make the final coating with a minimum layer.
General technique for working with liquid mixes for the floor
Work with bulk floors should be according to the generally accepted method. The dry mix is diluted according to the manufacturer's recommendations. The packaging contains detailed instructions.
The liquid solution is poured in small areas, stretched with a squeegee (using such a tool, you can control the thickness of the coating). To remove the smallest air bubbles from the fill layer, needle rollers are used. They need to roll the solution very carefully.
If you act carefully and accurately, even a beginner can create a beautiful and durable bulk floor in his kitchen. This will require only patience, proper preparation of the foundation and a certain amount of time.
What you need to know if you are still in doubt
What is a bulk floor and why is it also called self-leveling?


The self-leveling floor in the kitchen has a number of advantages over more familiar coatings (linoleum, ceramic tiles and so on). Among them are such characteristics:
- Moisture resistant
- Increased strength, long operational period, abrasion resistance,
- Seamlessness
- UV Resistance
- Environmental friendliness - after pouring, they do not emit harmful substances into the air, bacteria and microbes do not settle on them,
- Fire resistance and stability at high temperature exposure,
- Immunity to chemicals - therefore, any means can be used for washing,
- High installation speed - no need to pre-level the base, and if you want to fill the floor with your own hands it will not be difficult even for a beginner,
- A wide range of designs - from monochrome surfaces to 3D images, from matte to glossy textures. Due to the decorative layer or acrylic chips under the epoxy / polyurethane layer of the self-leveling floor, marble or stone flooring can be created.

- The service life is very long - this is both a plus and a minus, since a self-leveling floor (especially floors with a bright and complex design, for example with a 3D effect) can quickly get bored,
- The polymer floor has high strength, which is also good on the one hand, and on the other hand, dismantling will be difficult,
- Some species turn yellow over time due to ultraviolet radiation from the sun,
- It is necessary to carefully control the humidity of the substrate during operation,
- Bulk floor is an artificial material that not everyone likes.
- The polymer floor is colder than the laminate or linoleum, but not colder than the tiles.
Choose a design - photo of bulk floors in the interior of the kitchen
The bulk floor can be entered into any interior, but most of all it is suitable for finishing the kitchen in a modern style - Scandinavian, modern, high-tech, minimalism and, of course, in the loft and industrial.
But for classic kitchens, matte plain, or imitation stone or wood coatings are more suitable.

For finishing the kitchen in the style of minimalism and hi-tech, a seamless bulk floor is the best solution. It must be necessarily monophonic glossy or matte.
In the Scandinavian style, the design of the floor in the kitchen should also be intricate, the best color is white, but you can choose more vivid or contrasting colors. Or leave the floor as a rough screed.

The bulk floor in the interior of the kitchen in the loft and industrial style should not be decorative. Screed without gloss in this design will be more appropriate.

In modern modernity, gloss is most appropriate. The glossy self-leveling floor must be solid neutral colors.

Neutral, universal and win-win bulk floors - matt surfaces of white, milky, gray (concrete) and brown (wood) colors. Keep in mind that white is not the most practical color, but it is precisely this color that will visually make the kitchen lighter and more spacious, and will also become a wonderful background for both bright and austere design of the kitchen.

With the complex design of the floors with drawings and, especially with the 3D effect, you need to be very careful. Such elegant floors create a sense of confusion, visually make the kitchen smaller, oblige the rest of the kitchen to restraint and, most importantly, they quickly get bored.

The choice is made - we begin work with our own hands
In addition, before the process of creating a mixture and pouring it, it is necessary to prepare:
- Lighthouses - guides along which the floor will be poured. They indicate the level of filling, and also ensure evenness of the surface. In addition, they provide the necessary clearance between the floor and walls. Most often, wooden planks are chosen as beacons.
- To work, you need a supply of water. After all, the prepared mixture hardens very quickly.
Pouring the floors yourself, draw more water into the bath. So you will be insured against unforeseen interruptions in water supply.
- Professional shoes with spikes, the so-called "cats". Nozzles with steel spikes allow a person to move on a freshly poured floor without a trace.

Self-pouring of bulk floors is best done with a partner. After all, the prepared mixture dries very quickly, and together the work can be carried out at an accelerated pace.
Properly prepare and primer the base
How to make a bulk floor yourself? The first step is to prepare the foundation. It can not be leveled “flat”, but it is necessary to clean it from oil and glue stains, debris, dust. Otherwise, the bulk coating will not be able to adhere to the base completely and air bubbles will remain.
It is mandatory to close cracks and discontinuities in the old coating. This is especially true for wooden floors. If this is not done, then the whole “leak” through the cracks.
It is worth considering that the bulk floor has excellent self-leveling properties, but it will not hide significant changes in elevation. Therefore, in some cases, you still need to perform a screed. Also, it is important to measure the moisture content of the substrate.

After the base is cleaned, it must be primed, and especially carefully apply the primer mixture in the corners of the room. Which primer is suitable? Choose a universal film-forming primer or a deep penetration primer if the base is moisture-absorbing. You can determine this by pouring a little water on the surface - if the water is quickly absorbed, then a deep penetration primer is better. If in doubt - take the universal.

In the future, this will avoid defects. The primer remains to dry for 24 hours - after this you can start work.
We prepare the mixture and fill the floor
So, how to make a bulk floor with your own hands? As noted earlier, self-leveling mixtures vary in composition, and each of them has its own characteristics and cooking rules. Therefore, a composition consisting of two interacting components is diluted in strict accordance with the instructions on the package.
- The mixture must be mixed very carefully, paying particular attention to the corners of the container so that there are no elements that have not reacted,
- It is necessary to fill the mixture with water, and not vice versa. Otherwise, there will be lumps in the mixture.
The result should be a homogeneous viscous mass. Now you have 20-30 minutes to get started.

The mixture is poured onto a clean surface and spread onto the base with a squeegee or spatula. The distributed mixture is rolled several times with a needle roller, carefully eliminating air bubbles.
Rolling should be stopped at the moment when you notice an increase in the viscosity of the mixture.
The mixture is poured immediately over the entire area of the kitchen. Therefore, a partner is needed - one will apply the mixture, and the second will prepare a new composition.
To obtain high-quality kitchen coverage, it is recommended to fill in two stages. Thus, the overall characteristics of the coating are improved. First form the base layer and leave it to dry for several days. After this, the finish layer is filled.
The base layer hides all the basic "errors" of the base, therefore, increased thickness is performed. The finish layer, unlike the base layer, has a thickness of only a few millimeters. And only after the top layer has completely dried out, a protective coating layer is applied on top. It is important to apply the varnish without gaps, on the entire surface completely. After all, the topcoat has nothing to do with protection, and if you do not apply varnish, then ugly scratches will appear on the floor very quickly.
As for the drying time of the coating, it is indicated on the packaging - the manufacturer's recommendations should be fully observed. Until the coating dries, any significant effects on it should be avoided - direct sunlight, significant temperature differences, high humidity, and directed mechanical stress.
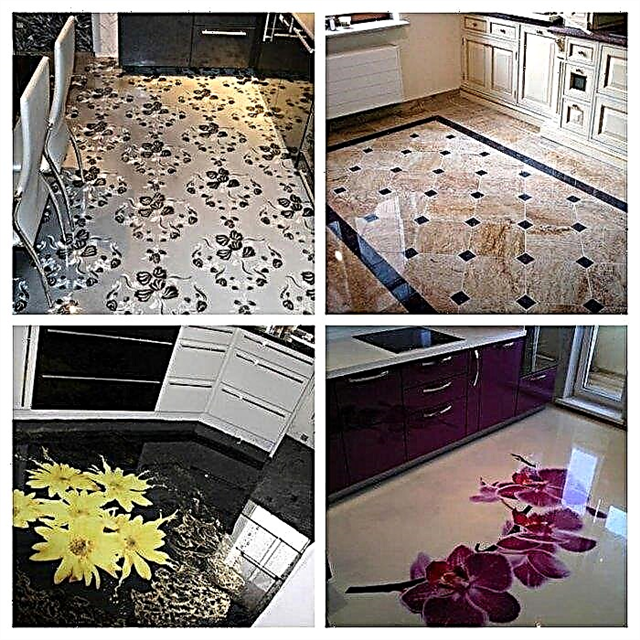
How can I decorate bulk kitchen floors
Since the self-leveling floors in the kitchen are applied in two layers, between them you can place the image on special paper or decorate the base layer with acrylic or polymer paints (using the airbrush technique). Between two layers of the bulk floor, pebbles and sand or special acrylic chips can be placed.
This is how a decorative bulk floor with a pattern is formed.

And here is a polymer floor device with a backing made of acrylic chips.
Types of floors
A distinctive feature of this coating is that it is not laid, but poured, getting an extremely smooth even surface without joints and seams.
It can be used on concrete, wood or any other basis. The layer thickness can range from 1 to 7 mm.

The best option is selected depending on the temperature and humidity in the room, as well as the load that will be assigned to it. Pay attention to bulk floors, if aesthetics and cleanliness come first.
They differ in composition, which affects the quality and reliability of this material:
- Methyl methacrylate. This is a universal option: they quickly harden, filling can be carried out even at low temperatures, the coating is highly durable, as well as resistant to scratches and other mechanical damage.
- Epoxy. It is endowed with enviable strength, moisture resistance, immunity to mechanical shocks, the influence of aggressive environments, including chemical ones. It can be used in bathrooms, pools, where there are acids, alkalis, solvents, etc.
- Polyurethane Increased strength and elasticity - this is the most significant advantage. They can be bent in different directions, without fear of cracks. They also have resistance to mechanical and chemical influences. It easily withstands loads of any strength, including point loads, differing in light weight.
- Cement-acrylic. It is made from a special building mixture, it is able to withstand severe shock, mechanical damage, resistant to significant temperature changes.
The first option has found the most widespread use in production and storage facilities.

At the same time, as everyone else can safely be used in arranging the floor of living rooms, halls, loggias and any other premises, for a long time delighting the owners with its reliability, practicality and aesthetics.
Here is one of the reviews about polymer floors:
We thought for a long time what floors to do in our kitchen. The husband wanted the tile again, but I still persuaded him to bulk. After a detailed study of information and consultation with friends, we settled on polymer. The result pleased us. The floor is much warmer than before (tile). It is too early to talk about wear resistance, since we made the repair only two months ago, but it is very easy to clean it. Svetlana
Advantages and disadvantages
Let's start with the advantages of bulk floors:
- Attractive appearance. The absence of seams, even beautiful shine will allow them to fit into any modern interiors, effectively emphasizing layouts in the style of loft, avant-garde, urban, industrial and other urban interior styles.
- Durability and wear resistance. Such a floor can last up to 40 years, even in intensive use. Resistance to moisture makes it an almost hermetic material, which, when casting, fills even the smallest cracks, holes and crevices. That is, no additional waterproofing is required.
- Excellent adhesion to any base, and no prior floor leveling is required. Theoretically, to fill the floor, you can not even remove the old tile, but we do not recommend doing this.
- Simplicity of installation work. The only thing that needs to be done is to pour it evenly and wait until the mixture hardens. No additional work required. Significant savings in installation time is also a significant advantage.
- Environmentally friendly material. Modern mixtures are endowed with absolute non-toxicity, so you can not worry about the fact that they will have a negative impact on health. You can install them even in children's rooms, as well as where people who are prone to allergic manifestations live.
- Fire safety. A burning match, a candle falling on it or fireworks will not do any harm to such a coating.
Unique design solutions can be obtained using special mixtures: glitters, flocks, acrylic “chips”.

This review shows the practical points of using bulk floors in the kitchen.
“They made bulk floors throughout the apartment. Of course, very beautiful, but slippery. Our little fidget fell several times in the corridor, not fitting into the turns. What particularly pleases me as a hostess is the ease of care. Using a damp cloth, any dirt is easily removed. A couple of times in my kitchen, knives fell on the floor, but the coating was not damaged, not even a scratch. Thanks to our designer, who ideally selected attractive solutions for each room that fit into the interior. I especially like the floor in the kitchen: a large white daisy flower on a dark background. For my black and white kitchen it’s the most. Thanks to them, you can easily recreate the texture of marble or any other non-trivial surface. Flocks can be monophonic or two-color, reminiscent of flakes, straws, etc., in their texture. Sparkles of sparkles look very impressive. Most often, a flock mix of soft, pastel colors is used for living quarters. Here, for example, is what one of the owners writes. “I want to brag of my bulk polymer floors. They are in my kitchen, hallway and bathroom. I really like it. But the main thing is not even external attractiveness, but how easy and simple it is to maintain them in decent cleanliness. With a vacuum cleaner all dirt is removed. I have had them for four years. What were, and remained so. Multi-colored sparkles are as bright. Many at one time discouraged me, citing the high cost, but I did not listen, which is incredibly happy. And now, many of the most ardent opponents have built such floors on their own. I advise everyone who is looking for simple, but practical and aesthetic solutions. Feedback from other people who already have experience in the selection and operation of bulk floors is an extremely important source of information. Glitters can be holographic, polyester, aluminum and irises. Polyester blotches have a hexagonal shape. “He made bulk floors at home a year ago. I bought a mixture and glitters. It turns out that everything can easily be done independently. Both my family and I are pleased with the result. The floor is warm, so we allow our baby to sit on it calmly. And it’s very easy to clean it. A wide selection of shades is striking: golden, silver, red, blue, green. Glitter irises can be made in the form of hearts, stars, crescents, etc. Chips are always applied to the main polymer layer. Glitters can be installed under the finish varnish. It is difficult to find the disadvantages of this flooring. The only negative is the difficulty of dismantling. If you want to change it, then it is much easier to carry out a new fill with a second layer on top of the old one. The total cost will depend on several factors: See the table below for approximate rates. Cost per sq.m / rub. *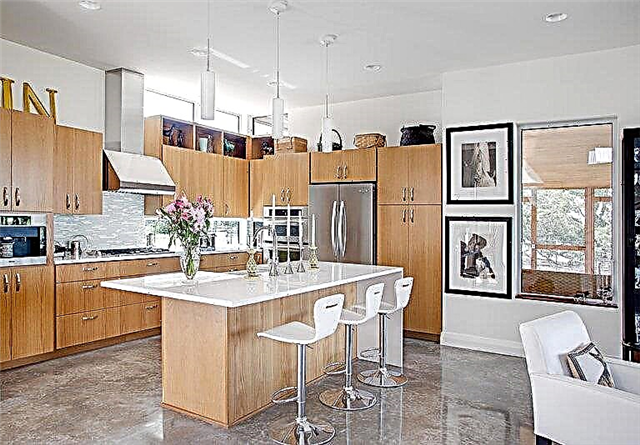


How much is the bulk floor?
 Assortment of Leroy Merlin store and approximate price order
 Substrate preparation with a regular cement screed from 150 Polyurethane 100-900 Epoxy 200-800 Self-leveling cement screed from 350 Dismantling the old coating from 250
*Prices are average for Moscow and the Moscow region. If necessary, additional services can be provided, for example, for waterproofing for 50-200 r / sq.m.
Self-leveling floor can also be poured. So you save a lot. Watch the video tutorial:
The bulk floor for the kitchen can act as:
- perfect flat base for further finishing with tiles, parquet, laminate or linoleum,
For these purposes, mixtures based on gypsum or cement are purchased.

- self cover subject to the application of a decorative finish. In this case, its main feature, which can be immediately noted externally, is a monolithic surface without joints and cracks.


These are also called liquid decorative floors.


In this case, to make a bulk floor, you need to purchase polymer, epoxy or cement-acrylic mixtures.
He is poured in several stages. The latter is done on the basis of a composition with the addition of various decorative components - sequins and other components that provide a beautiful matte, semi-gloss or glossy finish.


Why is the bulk floor marked as an ideal finish for the kitchen?
- Absolute moisture resistance, which is especially important for a kitchen room, and, as a result, resistance to fungi and bacteria.
- Resistance to household chemicals. You can clean using any disinfectant and not be afraid of wear.
- Super strength. This type of coating was originally intended for the decoration of industrial premises. In a residential building, it will withstand any load and will retain its original appearance for a long time. On average, a guarantee for it ranges from 10-15 years.
- Antistatic. Such a floor does not accumulate electricity, and therefore does not attract dust.
Quite rightly, for people who care about the environment and health, the question arises of the safety of such coverage. After all, the composition contains synthetic components - polymers or epoxies.
It should be understood that the safety of the polymer or epoxy coating can only be discussed after it hardens. After polymerization, the floor ceases to emit toxins. The important requirements here are:
- use of personal protective equipment (respirator or the like) during finishing work,
- good ventilation after solidification of the filler surface.

The need for ventilation will also become regular if you decide to do bulk floors in the kitchen. Such a coating preserves the room. And unlike breathable coatings based on natural components (laminate or parquet, for example), this option, in the absence of fresh air, can significantly affect the microclimate of the kitchen and, therefore, the well-being of residents.
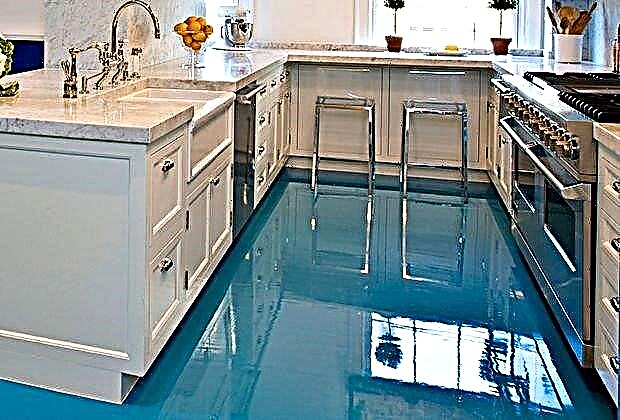
 A white or gray matte bulk floor in the kitchen is the perfect solution. Such a design will never get bored.

Kitchen design options with self-leveling floors + interior photos
Depending on the chosen design, self-leveling floors for the kitchen can look great in both classic and modern style.


Glossy plain floors are high-tech style-building elements.


For a classic interior, it is better to choose a bulk floor with a design that imitates natural stone.

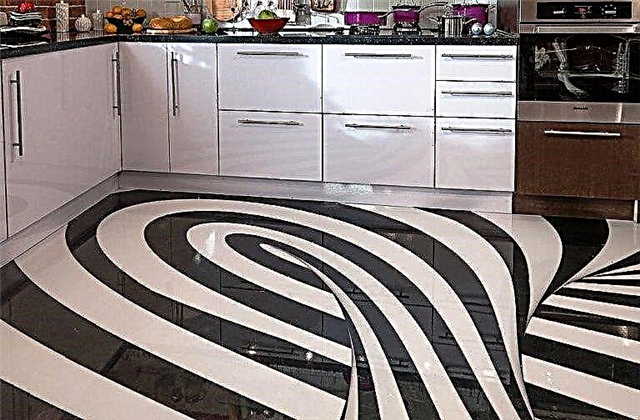
3D floors deserve special attention.


From the point of view of design, this is the most difficult option: under it, it is problematic to choose the appropriate style and color of furniture, decor. Despite all their unusualness and creativity, in the majority they are not worth the effort - they quickly bother, and it is difficult and expensive to dismantle.
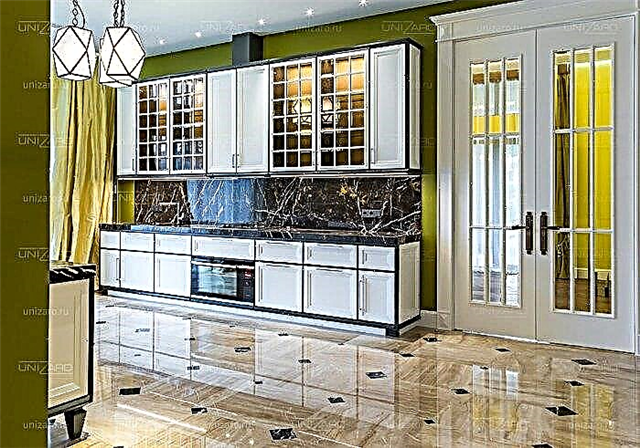
 It is better to refuse such a design. Drawings often look tasteless and do not combine with the basic style.
The cost of bulk floors in the kitchen (price per m 2)
| Name | Price per sq. meter |
|---|---|
| Self-leveling floor in the kitchen | from 300 rub / m 2 |
| Polymer bulk floor in the kitchen | from 400 rub / m 2 |
| Epoxy bulk floor in the kitchen | from 550 rub / m 2 |
| Polyurethane bulk in the kitchen | from 500 rub / m 2 |
| Decorative bulk floor in the kitchen | from 400 rub / m 2 |
| Bulk 3D floor in the kitchen | from 3000 rub / m 2 |
| Transparent bulk floor in the kitchen | from 600 rub / m 2 |
| Colored bulk floor in the kitchen | from 600 rub / m 2 |
| White bulk floor in the kitchen | from 600 rub / m 2 |
| Glossy bulk floor in the kitchen | from 600 rub / m 2 |
| Frosted bulk floor in the kitchen | from 600 rub / m 2 |
| Floor screed in the kitchen | from 600 rub / m 2 |
| Semi-dry floor screed in the kitchen | from 600 rub / m 2 |
| Repair of bulk floors | from 600 rub / m 2 |
| Dismantling of bulk floors | from 300 rub / m 2 |
See more on the website Stroi-f.ru
The technology of the device of bulk floors in the kitchen
The most suitable time to make a bulk floor in an apartment in the kitchen can be considered the repair of the entire room, since such coatings become an active element of the interior, and therefore, it makes no sense to integrate them into the old design, which, for sure, will not withstand competition and will have to change.
Directly filling the floor are several processes:
- it all starts with the preparation of the foundation: dismantling the old coating, leveling and, if necessary, repairing the screed. After that, the surface is cleaned and dust removed,
- the next stage is the application of a primer, the role of which is to protect the base and improve its adhesive characteristics. And in some cases, before filling the soil, waterproofing works are carried out,
- further - it is necessary to lay, along the perimeter of the room, a damping tape and install beacons,
- after that, the surface is ready for filling the base layer of the floor. At this stage, the necessary attention should be paid to leveling the solution with a squeegee and a needle roller, and this condition is mandatory, even though self-leveling mixtures are used for such bulk floors.It should also be noted that the needle roller also serves to achieve another goal, namely, to remove air from the solution. Ignoring this process is fraught with a decrease in coating strength.
The final stage is the application of the finish layer, in the role of which special varnish compositions are used.
Design of bulk floors in the kitchen
In some cases, between the base and finish layers it is possible to make an image for the device of which both finished materials and various artistic elements are used: shells, decorative sand, special “chips”, etc. A 3D drawing can also be made, which not only decorates the room, but also sets a certain mood for it.
For the installation of such surfaces, you can use different types of polymeric materials, but, given the fact that such coatings are arranged in an apartment or a house, the best option would be an epoxy self-leveling floor in the kitchen, although, in some cases, the use of polyurethane materials is justified.
But what kind of polymer floor will have in the kitchen, of course, depends on the preferences of the owner of the room, but not only. Be sure to take into account certain trends in design and the rules for combining colors, as well as the style of the interior. It is advisable to involve specialists at this stage, since such coatings will be used for a long time and a situation should not be allowed in which they become an annoying factor - it will not be easy to change them!
Floor fill calculator (bulk floor consumption)
The specialists of our company are ready to perform work of any complexity on the device of bulk floors in the kitchen and other turnkey rooms. You can fill out an application and order the installation of such coverage in an apartment or in a country house directly on the website of our company or by calling our office at the indicated numbers. In order to calculate the cost of work, you can leave your phone number, by which our specialists will quickly contact you and answer all your questions. You can independently make a preliminary calculation using the data from the table with prices.