Double-decker baths are built of logs, profiled and glued beams, the choice depends on preferences and financial capabilities. If we compare the log and the beam, then when building a bath with your own hands, it is better to give preference to the beam, since it has the following advantages:
- simplicity of assembly of a felling. You can do the work yourself
- slight shrinkage: glued timber only 2%, profiled - 5%,
- neat appearance
- easy to do interior decoration
- cheapness.
Whichever option you choose, in any case you will get a structure made of environmentally friendly material that retains heat well and withstands temperature extremes and high humidity.
How to build a sauna in the country yourself.
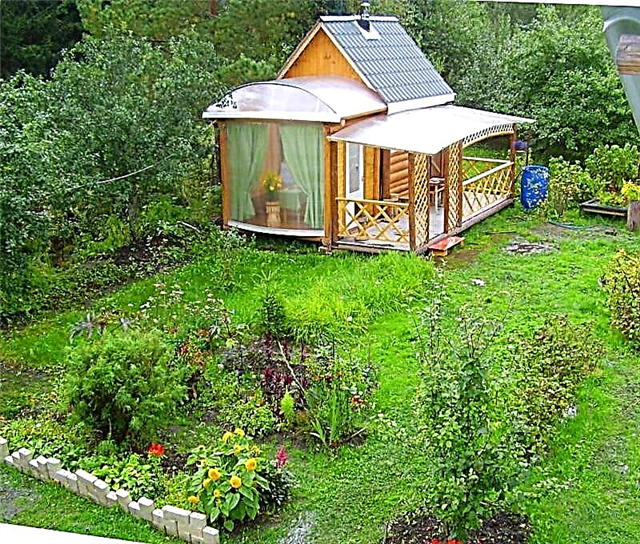
Sometimes one wants to leave the bustle and noise of the city, and go to the country. Silence, walking, doing things you love - what could be better! If comfort is provided in the country, I want to come again and again. One of the comfortable living conditions in the country is a bathhouse.

Construction can, of course, be entrusted to professional builders. However, it is quite possible to build and equip a bathhouse at a summer cottage independently. This eliminates additional costs and allows you to finish and improve in full accordance with your desires and preferences. Therefore, this task is not easy, but the beginner builder is quite capable of it. Own built bath will please the owners even more. So, how do you build a bath yourself?
Firstly, as with any construction, you must first determine the project and the materials from which the bath will be built. The choice of basic material for construction depends on the geographical location and operating conditions, as well as on your own capabilities.
Baths come from brick, aerated concrete and other stone materials, some prefer frame baths, however, many novice builders prefer to build a bath from a tree. This light and durable material does not require a serious and expensive foundation, but it has excellent characteristics. With proper care, the operation of the bath will not cause much trouble.
And of course, preference should be given to timber - a bath made of this material will retain all the advantages of a wooden structure and save from problems and additional costs that may arise during the construction of log walls. Building walls from a beam is similar to working with a designer - it can have different geometric sizes and cross-sections (rectangle, square, semicircular), and also, in the case of a profiled beam, there are grooves for fastening. Building from timber is easy and convenient - what could be better for a novice builder!
How to choose a place to build a bath.
One of the most important points is the choice of the location of the future building. The place must satisfy both existing legislation and usability. When choosing, basic recommendations can help:
- if there is a pond nearby - do not place the bathhouse too close to it, as the building will be in danger of flooding,
- it is necessary to decide how the bathhouse will be located relative to the house: as a separate building or will be attached to it, since each option has its positive and negative sides,
- it’s believed that it’s better to build a sauna in the backyard, in relative seclusion,
- it is necessary to provide for mandatory ventilation during construction, as well as provide for the disposal of wastewater,
- It’s highly discouraged to determine the location next to a passing road,
- when placing the building, it is necessary to take into account the cardinal directions and the direction of the wind: the best place is the southern part of the site, protected from the wind so that it does not interfere with vacationers, it is better to have windows facing the west,
- it is desirable that the bathhouse is located at some distance from other buildings, and if it is an extension to the house, it is imperative that the rules of fire safety be observed during construction, as, indeed, when erecting a separate building,
- when determining the location of the bathhouse and its size, it is necessary to observe the distances established by the rules from the boundaries of the site so that the neighbors do not feel any discomfort and make claims to the owner,
- It is recommended to observe the distance to the water intake (well or well) - not more than 20 meters.

Bath layout: recommendations.
At the beginning of construction, it is highly desirable to make a project, which should, inter alia, determine the optimal area of construction.

It is believed that the estimated area for 1 person should be approximately 5 sq.m. Thus, if the estimated number of visitors to the bath will be 4 people, its total area should not be less than 20 sq.m.

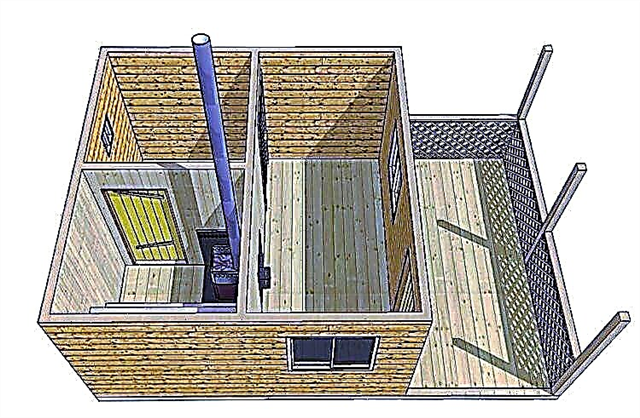
The minimum composition of the premises is as follows: steam room, washing, relaxation room and dressing room. It is important to determine the most convenient location of these rooms relative to each other, as well as their geometric dimensions.
First, you need to perform several diagrams and drawings:
- general building plan,
- drawings of each room individually,
- foundation device diagram,
- roof device diagram,
- plan for fastening and laying out the beam,
- plan for the floor and ceiling of the bath,
- The installation diagram of the furnace, taking into account its structural features.

All the necessary drawings can be done independently, as well as found in a variety of open sources. As a rule, saunas made of timber have similar designs and you can easily choose the most suitable. If you wish and have the necessary budget, you can order a design to a professional architect or builder.

The choice of building materials.
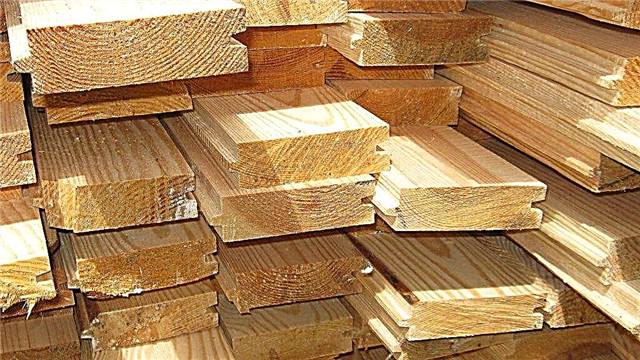
The following is a list of materials that will be needed to build a bath from a bar:
a) a beam of 150x150 mm, although it is possible to use a beam with a section of 100 mm or 200 mm,

b) floorboard (edged board 150x50 mm 4 meters long is perfect),
c) boards made of hardwood for ceiling installation (usually lining is used with a width of 100 mm and a thickness of 20 mm or more),

d) material for wall decoration (as a rule, the same lining is used),

e) material for vapor barrier (an excellent option would be to use a vapor barrier film),

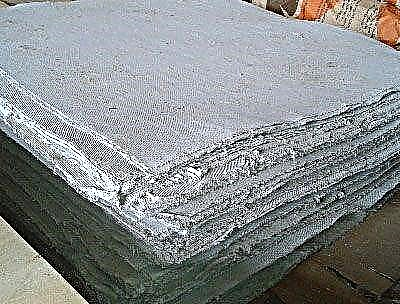
e) waterproofing (it is advisable to use penofol, although a plastic film is suitable),

g) ceiling insulation (a good option is mineral wool materials),

h) sheet asbestos for insulation of wooden structures from temperature effects, including for walls near the stove and elements located next to the chimney,
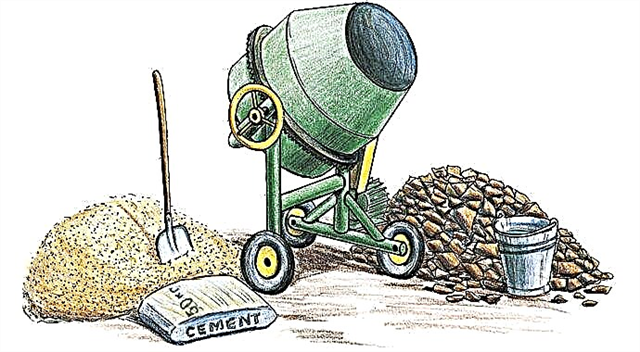
i) cement, sand and crushed stone for the installation of the foundation (recommendation - cement should be purchased before construction),
j) roofing material for the roof, which can be selected based on personal preferences and most importantly, that it fits seamlessly into the surrounding roofs of other buildings,
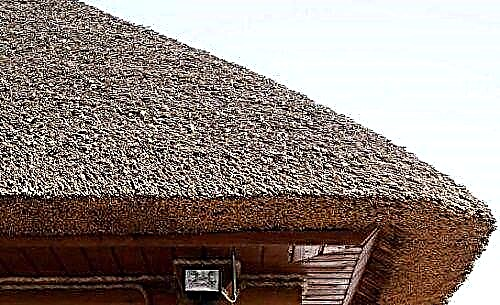 Thatched roof is comfortable unusual and cheap
 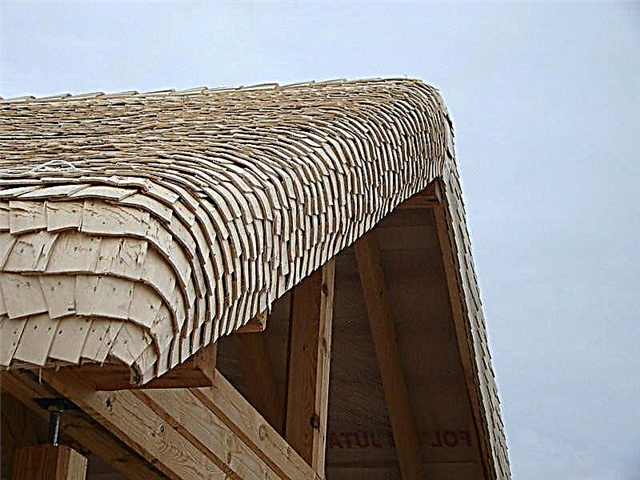 Roofing Shingles
  Polycarbonate roof for bath
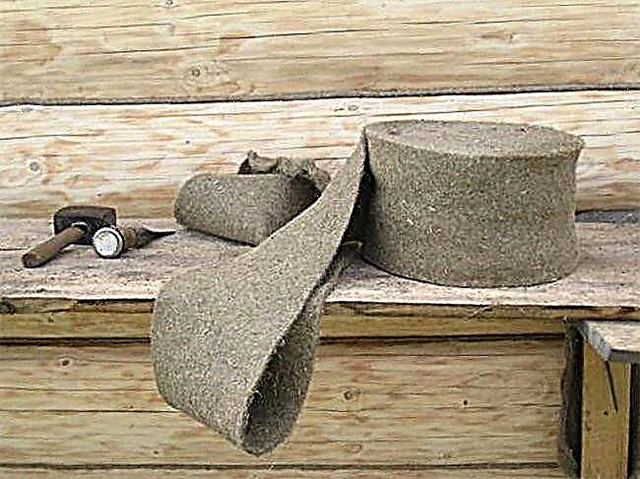
k) insulation for interventional space (it is better to use jute, although moss or tow will work fine).
The best time to start construction is spring, because after the completion of the main construction work it is necessary that the timber is dry and shrink. This requires at least 6 months.
Step I - preparing the territory for construction.
Before starting construction, it is necessary to clean the area - remove shrubs, stumps, remove garbage and all that will interfere with the work on the foundation.
 Preparation of the site for the construction of the bath
  Preparation of the site for the construction of the bath
Step II - building the foundation.
It is best to build a beam bath on a columnar foundation, which is inexpensive and excellent for the construction of small wooden and frame buildings.
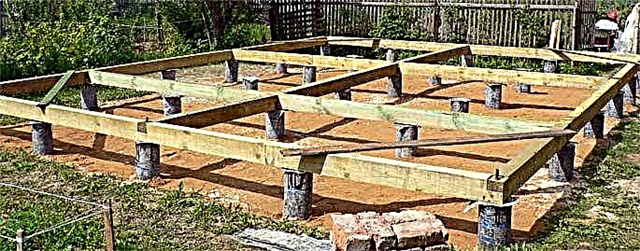
When constructing it, you must first dig a calculated number of pits for mounting supports. Their number is calculated as follows - the supports must be installed in the corners of the building and at the intersection of the walls, as well as with a certain step along their perimeter.
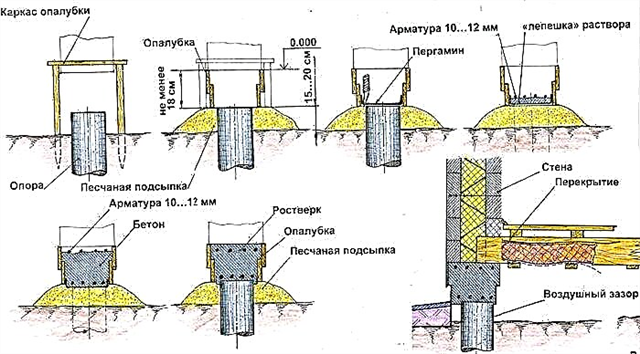
The step is selected, taking into account the type of soil and the estimated total weight of the structure. The depth of the pits should be 1-1.5 meters, although depending on the depth of freezing of the soil in a given area, it can vary. To perform this type of foundation, in addition to the materials listed above, asbestos-cement pipes and fittings will be required.

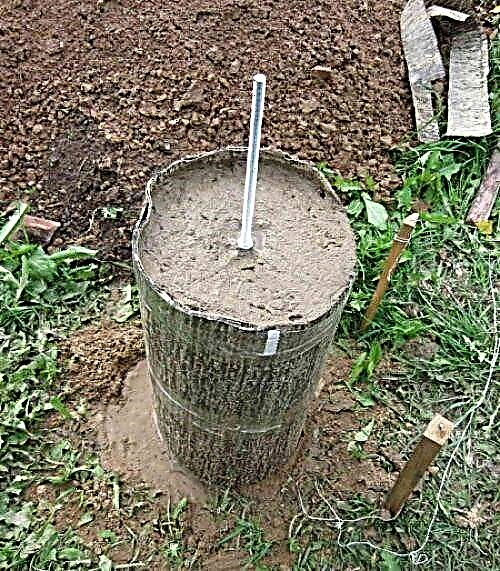
At the bottom of the pit, it is necessary to fill in a mixture of sand and gravel 10-15 cm thick. Then install an asbestos-cement pipe of the required length into it, strictly vertically, and fix it. Inside the pipe, several bars of reinforcement should be placed.

After that, pour concrete solution into the pipe and into the free space between the walls of the pit and the pipe.
 How to make a column foundation
 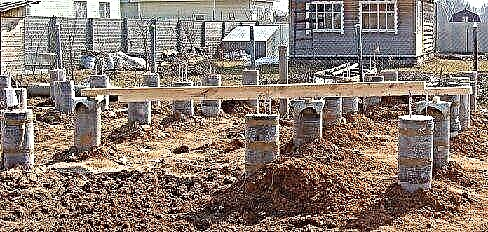 DIY column foundation
After pouring the solution, you need to wait a few days, and then put a half-brick-thick wall between the posts.

Step III - the construction of walls and the arrangement of the roof.
The traditional material for the erection of the walls of the bath is a beam measuring 150x150 mm. Before laying the first crown, it is mandatory to put waterproofing on the foundation. The lower part of the crown must be treated with an antiseptic. Most often, the timber is laid out in a “paw” way.
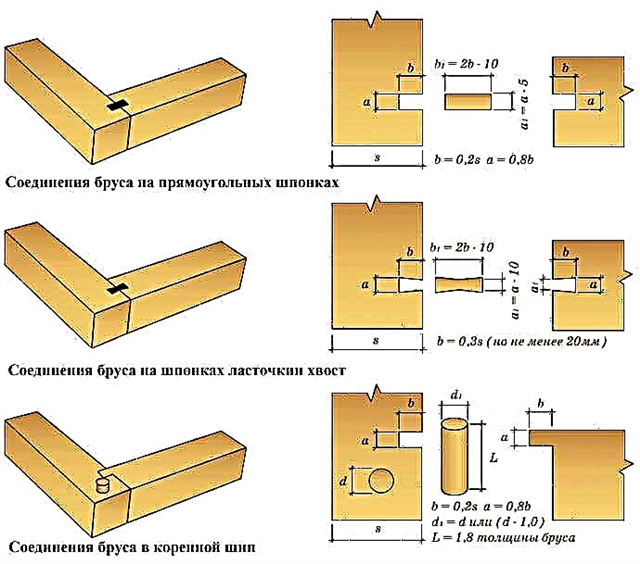 Join the bar in the paw

The first crown must be carefully aligned in geometric parameters - all angles should be exactly 90 degrees. After the first crown is erected, begin laying the bars for a set of walls. Laying out the walls, it is necessary to make openings for future doors and windows and it is imperative to insulate each row with the selected heat-insulating material.
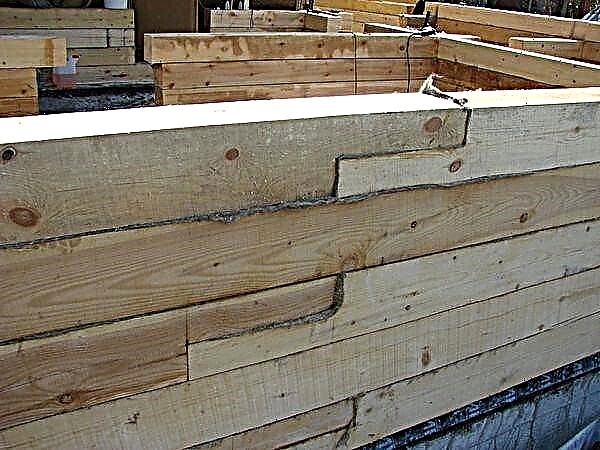
To connect the crowns, pins are used - metal or wooden pins.
After the walls are withdrawn, the roof device is installed. Depending on the chosen shape of the roof, it is necessary to fix the rafters, which are attached to the upper crown with brackets.
When a single-pitched sloping roof is installed, the rafters are fixed either with two external, or one external and one internal supports. When erecting a gable roof, the rafters from below must be reliably supported on the wall, and connected together from above to form a roofing ridge.
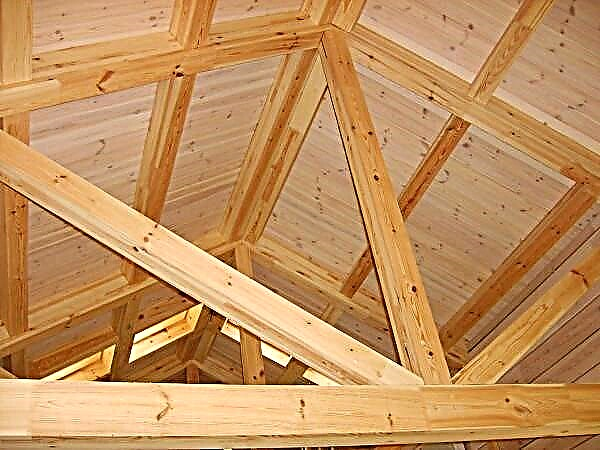 Floor beams
  Roof inside
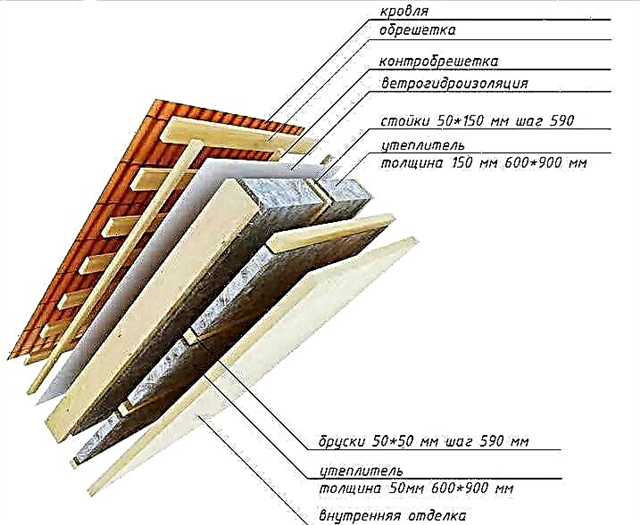
Lathing boards are attached to the fixed rafters, then hydro- and vapor barrier, insulation are laid on them.
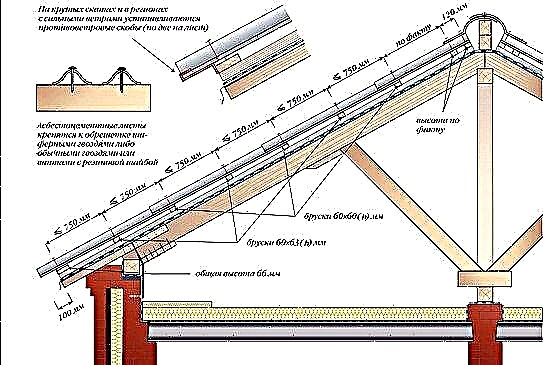
The roof device completes the installation of the selected roofing material.
Step IV - Interior Finishing Work.
The interior decoration needs to start with the communications device - sewage, water, electricity. About sewage should be worried even in the design and construction of the foundation.

It is necessary to dig a drainage well next to the future bathhouse, which includes a sewer pipe buried in the ground with a slope to remove drains from the washing compartment.

After completing the installation of the sewer, a finishing floor is made, which is made of wood or concrete. The concrete floor is more durable, most often it is tiled with tiles or porcelain.
If a wooden floor is selected for interior decoration, it is usually leaking. To do this, the floor boards are beaten to the installed lags with a small gap, or a small drain hole is closed in the floor, closed with a grate.

In this case, the floor must be done with a slight bias towards the drain. Then the water entering the drain will be discharged through the sewer into the drainage well.

After the sewage system, it is necessary to carry out insulation, hydro- and vapor barrier of the walls and ceiling using appropriate materials, to conduct electricity and water supply.

After installing windows and doors, then finish the premises using, for example, lining.

After finishing, you need to install the necessary electrical appliances.

Step V - Install the oven and shelves.
There are a lot of options for placing shelves, you just need to comply with the recommended sizes and that they must be made of hardwood. The installation principle is simple - a stable frame is mounted, usually from a beam, and boards are attached to it.
The furnace must be installed in full compliance with fire safety requirements. Wooden structures must be isolated from the effects of high temperatures of the working furnace and chimney. If the furnace is heavy, it must be installed on a specially equipped foundation. This is determined in each case, depending on the selected furnace.
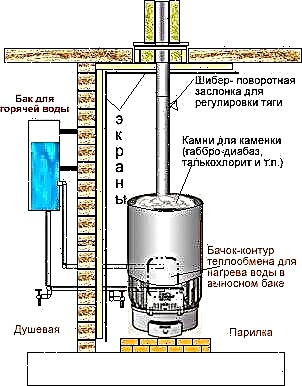
The stove is selected depending on the preferences of the owner. It can be a traditional wood-burning stove, a metal wood or electric stove, sometimes it is advisable to choose a gas stove for a bath.
For more information about choosing a stove for a bath, read our special article "How to choose the right stove for a bath."
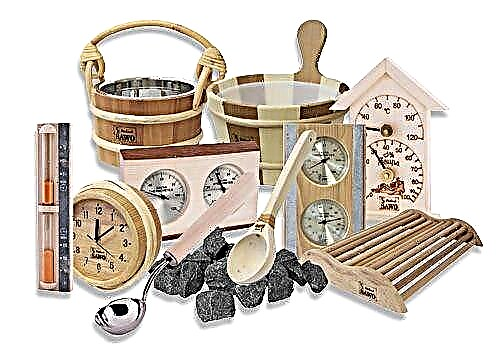
Step VI - Choosing Accessories
There are many accessories for the bath.

The main ones are:
- brooms (oak, birch and others),
- containers (buckets, basins),
- a wooden ladle for adding water,
- wooden lattices on the floor and much more.
The interior decoration of the premises, which remains at the discretion of the owner, can add an additional personality - here, depending on your desires and financial capabilities, you can give free rein to your imagination.

It must be added that all of the listed accessories can be made independently. The bathhouse is a great place to spend time in a pleasant, friendly company or with your family. It will be much more pleasant to realize that all this is done with your own hands, including useful and necessary devices: for example, hangers, lamps or ventilation grilles.
Installation progress
The first step is to choose a place for the future building. If your site is small, then it’s quite simple: the foundation should be laid where a residential building will not be built.
Now, the phased construction of the bathhouse with its own hands is approaching the arrangement of the ceiling, which has its own characteristics due to the presence of the most aggressive environment. Indeed, especially during operation in winter time, the heat affects the ceiling from below, which has gathered from the entire steam room, and there is severe frost from above.
The hemming design, which is performed as follows:
- Ceiling beams of the bath are installed. As in the case of the frame, you can use the methods in the paw and in the cup.

- We lay and fix the unedged board from above.
- On the inside, standing on a stepladder with a stele, a plastic film for waterproofing with release on the side walls, closing the beam openings.
- Between the beams we mount insulation sheets:
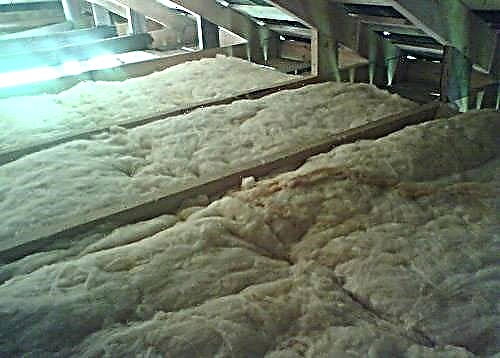
- felt,
- penoizol
- Styrofoam,
- polyurethane foam.
- Next, cover everything with aluminum foil for the bath. It serves for vapor barrier and reflection of thermal radiation. We fasten it with a film to ensure sealing.
- We beat wooden planks through the foil to the beams.
- We fix the grooved boards on the installed rails.
Wherein:- Between the ceiling lining and the wall, we leave two-centimeter gaps to ensure air conditioning.
- For fixing we use kleimers.
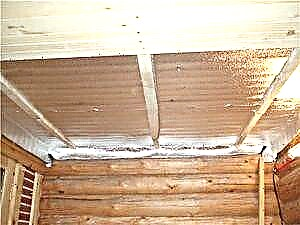
Dowel board sheathing
Roof
The roof structure can be used gable or single gable. The single-pitched course is economical, but also less practical.If you want your bathhouse to serve you for a long time and it is recommended that you install a gable system. Moreover, it will also make it possible to equip the attic utility room.

Rafters made of wood
The roof consists of a rafter system, lathing and insulating coating material. If you do not have experience in relevant work, then it is advisable to invite a specialist to carry out this stage.
Metal tile is perfect for coating. And if the slopes on one side of the building take out half a meter, then you can equip a wonderful woodpile.
Internal work
At this point, the ceiling and floor are ready, therefore, the steps of finishing the bath are now in wall cladding:
- We stuff parallel strips on the inner surface.
- Between them we install insulation materials. Basalt wool, felt, polystyrene foam and extruded polyurethane are still in demand.
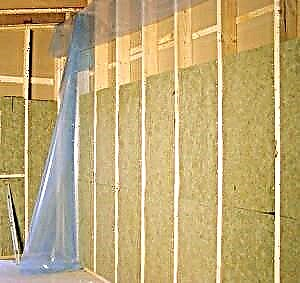
Wall insulation with felt
- The insulation is covered with foil to reflect thermal radiation.
- Sheathed with a grooved board using kleimers. This will save protruding hats of self-tapping screws, which can later cause burns.
Clapboard trim using kleimers
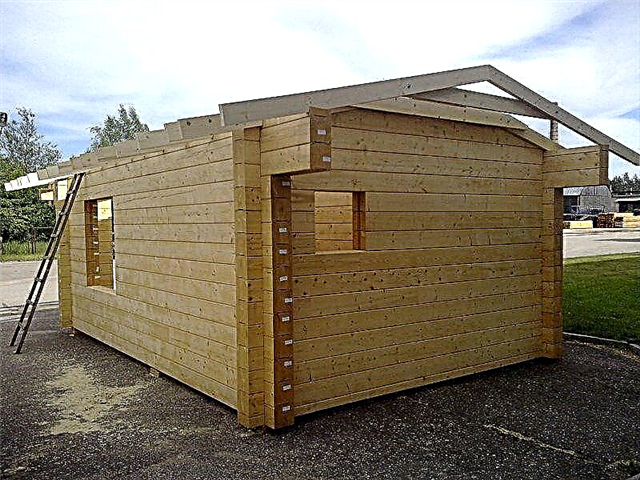
Everything, the bath is ready. It remains only to install furniture and an oven, after which you can start operating the bath.
Conclusion
Building a bath with your own hands is certainly a troublesome business. But the result is worth it. It is not possible to isolate the more important among all the stages of construction, all of them, one way or another, affect the quality of the future bath.
In addition to the construction recommendations themselves, some features should be remembered during work:
- The tree that is used for the construction and decoration of the bath is vulnerable to moisture and therefore it must be protected as much as possible by creating good ventilation and antiseptic treatment.
- The steam room will only be of high quality and economical in terms of fuel consumed when maximum thermal insulation is provided. Therefore, pay special attention to building insulation.

Ready to use bathhouse
The video in this article will introduce you to additional materials on this topic. Happy construction work!